Difference between revisions of "Rupie Mine"
Jump to navigation
Jump to search
imported>LikableBrute m |
>LikableBrute |
||
| Line 35: | Line 35: | ||
! Level !! Prod. Time !! {{Rupies}}Limit !! {{Rupies}}Cost !! Materials Required !! Build Time !! Payback Period | ! Level !! Prod. Time !! {{Rupies}}Limit !! {{Rupies}}Cost !! Materials Required !! Build Time !! Payback Period | ||
{{!}}- style="text-align:right;" | {{!}}- style="text-align:right;" | ||
| − | {{!}} 1 {{!}}{{!}} 6 hr {{!}}{{!}} 800 {{!}}{{!}} 50 {{!}}{{!}} style="text-align:left;" {{!}} — {{!}}{{!}} 3 sec {{!}}{{!}} | + | {{!}} 1 {{!}}{{!}} 6 hr {{!}}{{!}} 800 {{!}}{{!}} 50 {{!}}{{!}} style="text-align:left;" {{!}} — {{!}}{{!}} 3 sec {{!}}{{!}} 6 Hours |
{{!}}- style="text-align:right;" | {{!}}- style="text-align:right;" | ||
| − | {{!}} 2 {{!}}{{!}} 6 hr {{!}}{{!}} 850 {{!}}{{!}} 100 {{!}}{{!}} style="text-align:left;" {{!}} — {{!}}{{!}} 30 sec {{!}}{{!}} | + | {{!}} 2 {{!}}{{!}} 6 hr {{!}}{{!}} 850 {{!}}{{!}} 100 {{!}}{{!}} style="text-align:left;" {{!}} — {{!}}{{!}} 30 sec {{!}}{{!}} 12 Hours |
{{!}}- style="text-align:right;" | {{!}}- style="text-align:right;" | ||
| − | {{!}} 3 {{!}}{{!}} 6 hr {{!}}{{!}} 900 {{!}}{{!}} 150 {{!}}{{!}} style="text-align:left;" {{!}} — {{!}}{{!}} 1 min {{!}}{{!}} | + | {{!}} 3 {{!}}{{!}} 6 hr {{!}}{{!}} 900 {{!}}{{!}} 150 {{!}}{{!}} style="text-align:left;" {{!}} — {{!}}{{!}} 1 min {{!}}{{!}} 18 Hours |
{{!}}- style="text-align:right;" | {{!}}- style="text-align:right;" | ||
| − | {{!}} 4 {{!}}{{!}} 6 hr {{!}}{{!}} 950 {{!}}{{!}} 200 {{!}}{{!}} style="text-align:left;" {{!}} — {{!}}{{!}} 3 min {{!}}{{!}} | + | {{!}} 4 {{!}}{{!}} 6 hr {{!}}{{!}} 950 {{!}}{{!}} 200 {{!}}{{!}} style="text-align:left;" {{!}} — {{!}}{{!}} 3 min {{!}}{{!}} 24 Hours |
{{!}}- style="text-align:right;" | {{!}}- style="text-align:right;" | ||
| − | {{!}} 5 {{!}}{{!}} 6 hr {{!}}{{!}} 1,000 {{!}}{{!}} 250 {{!}}{{!}} style="text-align:left;" {{!}} — {{!}}{{!}} 5 min {{!}}{{!}} | + | {{!}} 5 {{!}}{{!}} 6 hr {{!}}{{!}} 1,000 {{!}}{{!}} 250 {{!}}{{!}} style="text-align:left;" {{!}} — {{!}}{{!}} 5 min {{!}}{{!}} 30 Hours |
{{!}}- style="text-align:right;" | {{!}}- style="text-align:right;" | ||
| − | {{!}} 6 {{!}}{{!}} 6 hr {{!}}{{!}} 1,050 {{!}}{{!}} 300 {{!}}{{!}} style="text-align:left;" {{!}} {{Icon|Material|Light Orb|size=19px|text=1}} x1 {{!}}{{!}} 10 min {{!}}{{!}} | + | {{!}} 6 {{!}}{{!}} 6 hr {{!}}{{!}} 1,050 {{!}}{{!}} 300 {{!}}{{!}} style="text-align:left;" {{!}} {{Icon|Material|Light Orb|size=19px|text=1}} x1 {{!}}{{!}} 10 min {{!}}{{!}} 36 Hours |
{{!}}- style="text-align:right;" | {{!}}- style="text-align:right;" | ||
| − | {{!}} 7 {{!}}{{!}} 6 hr {{!}}{{!}} 1,100 {{!}}{{!}} 350 {{!}}{{!}} style="text-align:left;" {{!}} {{Icon|Material|Light Orb|size=19px|text=1}} x1 {{!}}{{!}} 20 min {{!}}{{!}} | + | {{!}} 7 {{!}}{{!}} 6 hr {{!}}{{!}} 1,100 {{!}}{{!}} 350 {{!}}{{!}} style="text-align:left;" {{!}} {{Icon|Material|Light Orb|size=19px|text=1}} x1 {{!}}{{!}} 20 min {{!}}{{!}} 42 Hours |
{{!}}- style="text-align:right;" | {{!}}- style="text-align:right;" | ||
| − | {{!}} 8 {{!}}{{!}} 6 hr {{!}}{{!}} 1,150 {{!}}{{!}} 400 {{!}}{{!}} style="text-align:left;" {{!}} {{Icon|Material|Light Orb|size=19px|text=1}} x1 {{!}}{{!}} 40 min {{!}}{{!}} | + | {{!}} 8 {{!}}{{!}} 6 hr {{!}}{{!}} 1,150 {{!}}{{!}} 400 {{!}}{{!}} style="text-align:left;" {{!}} {{Icon|Material|Light Orb|size=19px|text=1}} x1 {{!}}{{!}} 40 min {{!}}{{!}} 48 Hours |
{{!}}- style="text-align:right;" | {{!}}- style="text-align:right;" | ||
| − | {{!}} 9 {{!}}{{!}} 6 hr {{!}}{{!}} 1,200 {{!}}{{!}} 500 {{!}}{{!}} style="text-align:left;" {{!}} {{Icon|Material|Light Orb|size=19px|text=1}} x2 {{!}}{{!}} 1 hr {{!}}{{!}} | + | {{!}} 9 {{!}}{{!}} 6 hr {{!}}{{!}} 1,200 {{!}}{{!}} 500 {{!}}{{!}} style="text-align:left;" {{!}} {{Icon|Material|Light Orb|size=19px|text=1}} x2 {{!}}{{!}} 1 hr {{!}}{{!}} 60 Hours |
{{!}}- style="text-align:right;" | {{!}}- style="text-align:right;" | ||
| − | {{!}} 10 {{!}}{{!}} 6 hr {{!}}{{!}} 1,250 {{!}}{{!}} 600 {{!}}{{!}} style="text-align:left;" {{!}} {{Icon|Material|Light Orb|size=19px|text=1}} x2 {{!}}{{!}} 2 hr {{!}}{{!}} | + | {{!}} 10 {{!}}{{!}} 6 hr {{!}}{{!}} 1,250 {{!}}{{!}} 600 {{!}}{{!}} style="text-align:left;" {{!}} {{Icon|Material|Light Orb|size=19px|text=1}} x2 {{!}}{{!}} 2 hr {{!}}{{!}} 72 Hours |
{{!}}- style="text-align:right;" | {{!}}- style="text-align:right;" | ||
| − | {{!}} 11 {{!}}{{!}} 6 hr {{!}}{{!}} 1,300 {{!}}{{!}} 700 {{!}}{{!}} style="text-align:left;" {{!}} {{Icon|Material|Light Orb|size=19px|text=1}} x3 {{!}}{{!}} 3 hr {{!}}{{!}} | + | {{!}} 11 {{!}}{{!}} 6 hr {{!}}{{!}} 1,300 {{!}}{{!}} 700 {{!}}{{!}} style="text-align:left;" {{!}} {{Icon|Material|Light Orb|size=19px|text=1}} x3 {{!}}{{!}} 3 hr {{!}}{{!}} 84 Hours |
{{!}}- style="text-align:right;" | {{!}}- style="text-align:right;" | ||
| − | {{!}} 12 {{!}}{{!}} 6 hr {{!}}{{!}} 1,350 {{!}}{{!}} 800 {{!}}{{!}} style="text-align:left;" {{!}} {{Icon|Material|Light Orb|size=19px|text=1}} x3 {{!}}{{!}} 4 hr {{!}}{{!}} | + | {{!}} 12 {{!}}{{!}} 6 hr {{!}}{{!}} 1,350 {{!}}{{!}} 800 {{!}}{{!}} style="text-align:left;" {{!}} {{Icon|Material|Light Orb|size=19px|text=1}} x3 {{!}}{{!}} 4 hr {{!}}{{!}} 96 Hours |
{{!}}- style="text-align:right;" | {{!}}- style="text-align:right;" | ||
| − | {{!}} 13 {{!}}{{!}} 6 hr {{!}}{{!}} 1,400 {{!}}{{!}} 900 {{!}}{{!}} style="text-align:left;" {{!}} {{Icon|Material|Light Orb|size=19px|text=1}} x3 {{!}}{{!}} 5 hr {{!}}{{!}} | + | {{!}} 13 {{!}}{{!}} 6 hr {{!}}{{!}} 1,400 {{!}}{{!}} 900 {{!}}{{!}} style="text-align:left;" {{!}} {{Icon|Material|Light Orb|size=19px|text=1}} x3 {{!}}{{!}} 5 hr {{!}}{{!}} 108 Hours |
{{!}}- style="text-align:right;" | {{!}}- style="text-align:right;" | ||
| − | {{!}} 14 {{!}}{{!}} 6 hr {{!}}{{!}} 1,450 {{!}}{{!}} 1,000 {{!}}{{!}} style="text-align:left;" {{!}} {{Icon|Material|Light Orb|size=19px|text=1}} x5 {{!}}{{!}} 6 hr {{!}}{{!}} | + | {{!}} 14 {{!}}{{!}} 6 hr {{!}}{{!}} 1,450 {{!}}{{!}} 1,000 {{!}}{{!}} style="text-align:left;" {{!}} {{Icon|Material|Light Orb|size=19px|text=1}} x5 {{!}}{{!}} 6 hr {{!}}{{!}} 120 Hours |
{{!}}- style="text-align:right;" | {{!}}- style="text-align:right;" | ||
| − | {{!}} 15 {{!}}{{!}} 6 hr {{!}}{{!}} 1,500 {{!}}{{!}} 1,100 {{!}}{{!}} style="text-align:left;" {{!}} {{Icon|Material|Light Orb|size=19px|text=1}} x5 {{!}}{{!}} 7 hr {{!}}{{!}} | + | {{!}} 15 {{!}}{{!}} 6 hr {{!}}{{!}} 1,500 {{!}}{{!}} 1,100 {{!}}{{!}} style="text-align:left;" {{!}} {{Icon|Material|Light Orb|size=19px|text=1}} x5 {{!}}{{!}} 7 hr {{!}}{{!}} 133 Hours |
{{!}}- style="text-align:right;" | {{!}}- style="text-align:right;" | ||
| − | {{!}} 16 {{!}}{{!}} 6 hr {{!}}{{!}} 1,550 {{!}}{{!}} 1,200 {{!}}{{!}} style="text-align:left;" {{!}} {{Icon|Material|Light Orb|size=19px|text=1}} x8, {{Icon|Material|Radiance Orb|size=19px|text=1}} x1 {{!}}{{!}} 8 hr {{!}}{{!}} | + | {{!}} 16 {{!}}{{!}} 6 hr {{!}}{{!}} 1,550 {{!}}{{!}} 1,200 {{!}}{{!}} style="text-align:left;" {{!}} {{Icon|Material|Light Orb|size=19px|text=1}} x8, {{Icon|Material|Radiance Orb|size=19px|text=1}} x1 {{!}}{{!}} 8 hr {{!}}{{!}} 146 Hours |
{{!}}- style="text-align:right;" | {{!}}- style="text-align:right;" | ||
| − | {{!}} 17 {{!}}{{!}} 6 hr {{!}}{{!}} 1,600 {{!}}{{!}} 1,400 {{!}}{{!}} style="text-align:left;" {{!}} {{Icon|Material|Light Orb|size=19px|text=1}} x8, {{Icon|Material|Radiance Orb|size=19px|text=1}} x1 {{!}}{{!}} 10 hr {{!}}{{!}} | + | {{!}} 17 {{!}}{{!}} 6 hr {{!}}{{!}} 1,600 {{!}}{{!}} 1,400 {{!}}{{!}} style="text-align:left;" {{!}} {{Icon|Material|Light Orb|size=19px|text=1}} x8, {{Icon|Material|Radiance Orb|size=19px|text=1}} x1 {{!}}{{!}} 10 hr {{!}}{{!}} 172 Hours |
{{!}}- style="text-align:right;" | {{!}}- style="text-align:right;" | ||
| − | {{!}} 18 {{!}}{{!}} 6 hr {{!}}{{!}} 1,650 {{!}}{{!}} 1,600 {{!}}{{!}} style="text-align:left;" {{!}} {{Icon|Material|Light Orb|size=19px|text=1}} x8, {{Icon|Material|Radiance Orb|size=19px|text=1}} x1 {{!}}{{!}} 12 hr {{!}}{{!}} | + | {{!}} 18 {{!}}{{!}} 6 hr {{!}}{{!}} 1,650 {{!}}{{!}} 1,600 {{!}}{{!}} style="text-align:left;" {{!}} {{Icon|Material|Light Orb|size=19px|text=1}} x8, {{Icon|Material|Radiance Orb|size=19px|text=1}} x1 {{!}}{{!}} 12 hr {{!}}{{!}} 198 Hours |
{{!}}- style="text-align:right;" | {{!}}- style="text-align:right;" | ||
| − | {{!}} 19 {{!}}{{!}} 6 hr {{!}}{{!}} 1,700 {{!}}{{!}} 1,800 {{!}}{{!}} style="text-align:left;" {{!}} {{Icon|Material|Light Orb|size=19px|text=1}} x10, {{Icon|Material|Radiance Orb|size=19px|text=1}} x1 {{!}}{{!}} 14 hr {{!}}{{!}} | + | {{!}} 19 {{!}}{{!}} 6 hr {{!}}{{!}} 1,700 {{!}}{{!}} 1,800 {{!}}{{!}} style="text-align:left;" {{!}} {{Icon|Material|Light Orb|size=19px|text=1}} x10, {{Icon|Material|Radiance Orb|size=19px|text=1}} x1 {{!}}{{!}} 14 hr {{!}}{{!}} 224 Hours |
{{!}}- style="text-align:right;" | {{!}}- style="text-align:right;" | ||
| − | {{!}} 20 {{!}}{{!}} 6 hr {{!}}{{!}} 1,750 {{!}}{{!}} 2,000 {{!}}{{!}} style="text-align:left;" {{!}} {{Icon|Material|Light Orb|size=19px|text=1}} x10, {{Icon|Material|Radiance Orb|size=19px|text=1}} x1 {{!}}{{!}} 16 hr {{!}}{{!}} | + | {{!}} 20 {{!}}{{!}} 6 hr {{!}}{{!}} 1,750 {{!}}{{!}} 2,000 {{!}}{{!}} style="text-align:left;" {{!}} {{Icon|Material|Light Orb|size=19px|text=1}} x10, {{Icon|Material|Radiance Orb|size=19px|text=1}} x1 {{!}}{{!}} 16 hr {{!}}{{!}} 250 Hours |
{{!}}- style="text-align:right;" | {{!}}- style="text-align:right;" | ||
| − | {{!}} 21 {{!}}{{!}} 6 hr {{!}}{{!}} 1,800 {{!}}{{!}} 2,200 {{!}}{{!}} style="text-align:left;" {{!}} {{Icon|Material|Light Orb|size=19px|text=1}} x15, {{Icon|Material|Radiance Orb|size=19px|text=1}} x2 {{!}}{{!}} 18 hr {{!}}{{!}} | + | {{!}} 21 {{!}}{{!}} 6 hr {{!}}{{!}} 1,800 {{!}}{{!}} 2,200 {{!}}{{!}} style="text-align:left;" {{!}} {{Icon|Material|Light Orb|size=19px|text=1}} x15, {{Icon|Material|Radiance Orb|size=19px|text=1}} x2 {{!}}{{!}} 18 hr {{!}}{{!}} 276 Hours |
{{!}}- style="text-align:right;" | {{!}}- style="text-align:right;" | ||
| − | {{!}} 22 {{!}}{{!}} 6 hr {{!}}{{!}} 1,850 {{!}}{{!}} 2,400 {{!}}{{!}} style="text-align:left;" {{!}} {{Icon|Material|Light Orb|size=19px|text=1}} x15, {{Icon|Material|Radiance Orb|size=19px|text=1}} x2 {{!}}{{!}} 20 hr {{!}}{{!}} | + | {{!}} 22 {{!}}{{!}} 6 hr {{!}}{{!}} 1,850 {{!}}{{!}} 2,400 {{!}}{{!}} style="text-align:left;" {{!}} {{Icon|Material|Light Orb|size=19px|text=1}} x15, {{Icon|Material|Radiance Orb|size=19px|text=1}} x2 {{!}}{{!}} 20 hr {{!}}{{!}} 302 Hours |
{{!}}- style="text-align:right;" | {{!}}- style="text-align:right;" | ||
| − | {{!}} 23 {{!}}{{!}} 6 hr {{!}}{{!}} 1,900 {{!}}{{!}} 2,600 {{!}}{{!}} style="text-align:left;" {{!}} {{Icon|Material|Light Orb|size=19px|text=1}} x15, {{Icon|Material|Radiance Orb|size=19px|text=1}} x2 {{!}}{{!}} 22 hr {{!}}{{!}} | + | {{!}} 23 {{!}}{{!}} 6 hr {{!}}{{!}} 1,900 {{!}}{{!}} 2,600 {{!}}{{!}} style="text-align:left;" {{!}} {{Icon|Material|Light Orb|size=19px|text=1}} x15, {{Icon|Material|Radiance Orb|size=19px|text=1}} x2 {{!}}{{!}} 22 hr {{!}}{{!}} 328 Hours |
{{!}}- style="text-align:right;" | {{!}}- style="text-align:right;" | ||
| − | {{!}} 24 {{!}}{{!}} 6 hr {{!}}{{!}} 1,950 {{!}}{{!}} 2,800 {{!}}{{!}} style="text-align:left;" {{!}} {{Icon|Material|Light Orb|size=19px|text=1}} x20, {{Icon|Material|Radiance Orb|size=19px|text=1}} x2 {{!}}{{!}} 24 hr {{!}}{{!}} | + | {{!}} 24 {{!}}{{!}} 6 hr {{!}}{{!}} 1,950 {{!}}{{!}} 2,800 {{!}}{{!}} style="text-align:left;" {{!}} {{Icon|Material|Light Orb|size=19px|text=1}} x20, {{Icon|Material|Radiance Orb|size=19px|text=1}} x2 {{!}}{{!}} 24 hr {{!}}{{!}} 354 Hours |
{{!}}- style="text-align:right;" | {{!}}- style="text-align:right;" | ||
| − | {{!}} 25 {{!}}{{!}} 6 hr {{!}}{{!}} 2,000 {{!}}{{!}} 3,000 {{!}}{{!}} style="text-align:left;" {{!}} {{Icon|Material|Light Orb|size=19px|text=1}} x20, {{Icon|Material|Radiance Orb|size=19px|text=1}} x2 {{!}}{{!}} 28 hr {{!}}{{!}} | + | {{!}} 25 {{!}}{{!}} 6 hr {{!}}{{!}} 2,000 {{!}}{{!}} 3,000 {{!}}{{!}} style="text-align:left;" {{!}} {{Icon|Material|Light Orb|size=19px|text=1}} x20, {{Icon|Material|Radiance Orb|size=19px|text=1}} x2 {{!}}{{!}} 28 hr {{!}}{{!}} 382 Hours |
{{!}}- style="text-align:right;" | {{!}}- style="text-align:right;" | ||
| − | {{!}} 26 {{!}}{{!}} 6 hr {{!}}{{!}} 2,050 {{!}}{{!}} 3,200 {{!}}{{!}} style="text-align:left;" {{!}} {{Icon|Material|Light Orb|size=19px|text=1}} x30, {{Icon|Material|Radiance Orb|size=19px|text=1}} x3, {{Icon|Material|Refulgence Orb|size=19px|text=1}} x1 {{!}}{{!}} 32 hr {{!}}{{!}} | + | {{!}} 26 {{!}}{{!}} 6 hr {{!}}{{!}} 2,050 {{!}}{{!}} 3,200 {{!}}{{!}} style="text-align:left;" {{!}} {{Icon|Material|Light Orb|size=19px|text=1}} x30, {{Icon|Material|Radiance Orb|size=19px|text=1}} x3, {{Icon|Material|Refulgence Orb|size=19px|text=1}} x1 {{!}}{{!}} 32 hr {{!}}{{!}} 410 Hours |
{{!}}- style="text-align:right;" | {{!}}- style="text-align:right;" | ||
| − | {{!}} 27 {{!}}{{!}} 6 hr {{!}}{{!}} 2,100 {{!}}{{!}} 3,400 {{!}}{{!}} style="text-align:left;" {{!}} {{Icon|Material|Light Orb|size=19px|text=1}} x30, {{Icon|Material|Radiance Orb|size=19px|text=1}} x3, {{Icon|Material|Refulgence Orb|size=19px|text=1}} x1 {{!}}{{!}} 36 hr {{!}}{{!}} | + | {{!}} 27 {{!}}{{!}} 6 hr {{!}}{{!}} 2,100 {{!}}{{!}} 3,400 {{!}}{{!}} style="text-align:left;" {{!}} {{Icon|Material|Light Orb|size=19px|text=1}} x30, {{Icon|Material|Radiance Orb|size=19px|text=1}} x3, {{Icon|Material|Refulgence Orb|size=19px|text=1}} x1 {{!}}{{!}} 36 hr {{!}}{{!}} 438 Hours |
{{!}}- style="text-align:right;" | {{!}}- style="text-align:right;" | ||
| − | {{!}} 28 {{!}}{{!}} 6 hr {{!}}{{!}} 2,150 {{!}}{{!}} 3,600 {{!}}{{!}} style="text-align:left;" {{!}} {{Icon|Material|Light Orb|size=19px|text=1}} x30, {{Icon|Material|Radiance Orb|size=19px|text=1}} x3, {{Icon|Material|Refulgence Orb|size=19px|text=1}} x1 {{!}}{{!}} 40 hr {{!}}{{!}} | + | {{!}} 28 {{!}}{{!}} 6 hr {{!}}{{!}} 2,150 {{!}}{{!}} 3,600 {{!}}{{!}} style="text-align:left;" {{!}} {{Icon|Material|Light Orb|size=19px|text=1}} x30, {{Icon|Material|Radiance Orb|size=19px|text=1}} x3, {{Icon|Material|Refulgence Orb|size=19px|text=1}} x1 {{!}}{{!}} 40 hr {{!}}{{!}} 466 Hours |
{{!}}- style="text-align:right;" | {{!}}- style="text-align:right;" | ||
| − | {{!}} 29 {{!}}{{!}} 6 hr {{!}}{{!}} 2,200 {{!}}{{!}} 3,800 {{!}}{{!}} style="text-align:left;" {{!}} {{Icon|Material|Light Orb|size=19px|text=1}} x40, {{Icon|Material|Radiance Orb|size=19px|text=1}} x3, {{Icon|Material|Refulgence Orb|size=19px|text=1}} x1 {{!}}{{!}} 44 hr {{!}}{{!}} | + | {{!}} 29 {{!}}{{!}} 6 hr {{!}}{{!}} 2,200 {{!}}{{!}} 3,800 {{!}}{{!}} style="text-align:left;" {{!}} {{Icon|Material|Light Orb|size=19px|text=1}} x40, {{Icon|Material|Radiance Orb|size=19px|text=1}} x3, {{Icon|Material|Refulgence Orb|size=19px|text=1}} x1 {{!}}{{!}} 44 hr {{!}}{{!}} 494 Hours |
{{!}}- style="text-align:right;" | {{!}}- style="text-align:right;" | ||
| − | {{!}} 30 {{!}}{{!}} 6 hr {{!}}{{!}} 2,250 {{!}}{{!}} 4,000 {{!}}{{!}} style="text-align:left;" {{!}} {{Icon|Material|Light Orb|size=19px|text=1}} x40, {{Icon|Material|Radiance Orb|size=19px|text=1}} x3, {{Icon|Material|Refulgence Orb|size=19px|text=1}} x1 {{!}}{{!}} 48 hr {{!}}{{!}} | + | {{!}} 30 {{!}}{{!}} 6 hr {{!}}{{!}} 2,250 {{!}}{{!}} 4,000 {{!}}{{!}} style="text-align:left;" {{!}} {{Icon|Material|Light Orb|size=19px|text=1}} x40, {{Icon|Material|Radiance Orb|size=19px|text=1}} x3, {{Icon|Material|Refulgence Orb|size=19px|text=1}} x1 {{!}}{{!}} 48 hr {{!}}{{!}} 522 Hours |
{{!}}- style="text-align:right;" | {{!}}- style="text-align:right;" | ||
| − | {{!}}style="text-align:center;" colspan="3"{{!}} Total {{!}}{{!}} 46,400 {{!}}{{!}} {{Icon|Material|Light Orb|size=19px|text=1}} x325, {{Icon|Material|Radiance Orb|size=19px|text=1}} x30, {{Icon|Material|Refulgence Orb|size=19px|text=1}} x5 {{!}}{{!}} 16.7 days {{!}}{{!}} | + | {{!}}style="text-align:center;" colspan="3"{{!}} Total {{!}}{{!}} 46,400 {{!}}{{!}} {{Icon|Material|Light Orb|size=19px|text=1}} x325, {{Icon|Material|Radiance Orb|size=19px|text=1}} x30, {{Icon|Material|Refulgence Orb|size=19px|text=1}} x5 {{!}}{{!}} 16.7 days {{!}}{{!}} |
{{!}}} | {{!}}} | ||
|OtherInfo= | |OtherInfo= | ||
{{StylizedHeader|Payback Period}} | {{StylizedHeader|Payback Period}} | ||
| − | The time it takes for each individual level of the Rupie Mine to break even, or pay itself off, | + | The time it takes for each individual level of the Rupie Mine to break even, or pay itself off compared to the amount you would be making on the previous level. |
| + | |||
| + | Since the increase for each level is always 50, all levels will use 50 as the profit. The payback period of 1 level has no effect on the payback period of another level, they are all independent, and can occur simultaneously. | ||
<pre> | <pre> | ||
| − | PaybackPeriod = Cost/( | + | PaybackPeriod = Cost/(50/6 hrs) + max(BuildTime-6 hrs,0) |
</pre> | </pre> | ||
| − | The first term in the formula calculates the time it takes to cover the cost of the upgrade at that level's income rate. The second term accounts for the time period where potential {{Rupies-}} are lost because they cannot be collected during construction. Since this only happens when the build time exceeds 6 hours, the second term rejects negative numbers and only keeps zero/positive numbers. | + | The first term in the formula calculates the time it takes to cover the cost of the upgrade at that level's bonus income rate. The second term accounts for the time period where potential {{Rupies-}} are lost because they cannot be collected during construction. Since this only happens when the build time exceeds 6 hours, the second term rejects negative numbers and only keeps zero/positive numbers. |
| − | |||
}} | }} | ||
Revision as of 13:08, 29 October 2018
Rupie Mine
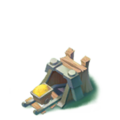
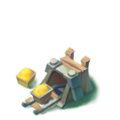
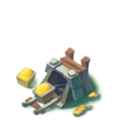
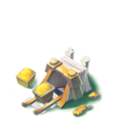

| |||||||||||||||||||||||||||||||||||||||||