>Eave |
>Eave |
| Line 62: |
Line 62: |
| | '''Primary Reward:''' {{Icon|Material|Shadow Orb|text=0|size=32px}} {{Icon|Material|Nightfall Orb|text=0|size=32px}} {{Icon|Material|Nether Orb|text=0|size=32px}} | | '''Primary Reward:''' {{Icon|Material|Shadow Orb|text=0|size=32px}} {{Icon|Material|Nightfall Orb|text=0|size=32px}} {{Icon|Material|Nether Orb|text=0|size=32px}} |
| | | | |
| − | =Challenge Events=
| + | {{:Event Quests/Challenge Events}} |
| − | ==Dragon Trials==
| |
| − | [[File:Banner Dragon Trials.png|450px|link=]]
| |
| − | | |
| − | '''Unlock:''' Chapter 3/4-4<br />
| |
| − | '''Primary Reward:''' Dragon Scales/Wyrm Spheres<br />
| |
| − | '''Event Exchange Shop:''' [[Shop#Dragon Trials|Dragon Trials Exchange]]
| |
| − | | |
| − | ===[[Midgardsormr's Trial]]===
| |
| − | [[File:Banner Midgardsormr's Trial.png|350px|link=Midgardsormr's Trial]]
| |
| − | | |
| − | '''Unlock:''' Chapter 3/4-4<br />
| |
| − | '''Primary Reward:''' {{Icon|Material|Windwyrm's Scale|text=0|size=32px}} {{Icon|Material|Windwyrm's Squallscale|text=0|size=32px}} {{Icon|Material|Windwyrm's Sphere|text=0|size=32px}}
| |
| − | | |
| − | ===[[Mercury's Trial]]===
| |
| − | [[File:Banner Mercury's Trial.png|350px|link=Mercury's Trial]]
| |
| − | | |
| − | '''Unlock:''' Chapter 3/4-4<br />
| |
| − | '''Primary Reward:''' {{Icon|Material|Waterwyrm's Scale|text=0|size=32px}} {{Icon|Material|Waterwyrm's Glistscale|text=0|size=32px}} {{Icon|Material|Waterwyrm's Sphere|text=0|size=32px}}
| |
| − | | |
| − | ===[[Brunhilda's Trial]]===
| |
| − | [[File:Banner Brunhilda's Trial.png|350px|link=Brunhilda's Trial]]
| |
| − | | |
| − | '''Unlock:''' Chapter 3/4-4<br />
| |
| − | '''Primary Reward:''' {{Icon|Material|Flamewyrm's Scale|text=0|size=32px}} {{Icon|Material|Flamewyrm's Scaldscale|text=0|size=32px}} {{Icon|Material|Flamewyrm's Sphere|text=0|size=32px}}
| |
| − | | |
| − | ===[[Jupiter's Trial]]===
| |
| − | [[File:Banner Jupiter's Trial.png|350px|link=Jupiter's Trial]]
| |
| − | | |
| − | '''Unlock:''' Chapter 4/5-4<br />
| |
| − | '''Primary Reward:''' {{Icon|Material|Lightwyrm's Scale|text=0|size=32px}} {{Icon|Material|Lightwyrm's Glowscale|text=0|size=32px}} {{Icon|Material|Lightwyrm's Sphere|text=0|size=32px}}
| |
| − | | |
| − | ===[[Zodiark's Trial]]===
| |
| − | [[File:Banner Zodiark's Trial.png|350px|link=Zodiark's Trial]]
| |
| − | | |
| − | '''Unlock:''' Chapter 5/4-4<br />
| |
| − | '''Primary Reward:''' {{Icon|Material|Shadowwyrm's Scale|text=0|size=32px}} {{Icon|Material|Shadowwyrm's Darkscale|text=0|size=32px}} {{Icon|Material|Shadowwyrm's Sphere|text=0|size=32px}}
| |
| − | | |
| − | ==Advanced Dragon Trials==
| |
| − | [[File:Banner Advanced Dragon Trials.png|450px|link=]]
| |
| − | | |
| − | '''Unlock:''' Complete Master Difficulty Dragon Trial<br />
| |
| − | '''Primary Reward:''' Wyrm Greatspheres, High Dragon Weapon Materials<br />
| |
| − | '''Event Exchange Shop:''' [[Shop#Advanced Dragon Trials|Advanced Dragon Trials Exchange]]
| |
| − | | |
| − | <div style="font-style:italic;font-size:.9em;">Standard/Expert Difficulties are always available, while Master Difficulty rotates on the following schedule:</div>
| |
| − | {{MasterHDTSchedule}}
| |
| − | | |
| − | ===[[High Midgardsormr's Trial]]===
| |
| − | [[File:Banner High Midgardsormr's Trial.png|350px|link=High Midgardsormr's Trial]]
| |
| − | | |
| − | '''Unlock:''' Complete [[Midgardsormr's Trial#Master|Midgardsormr's Trial: Master]]<br />
| |
| − | '''Prologue:''' [[The Height of the Tempest]]<br />
| |
| − | '''Primary Reward:''' {{Icon|Material|Windwyrm's Squallscale|text=0|size=32px}} {{Icon|Material|Windwyrm's Sphere|text=0|size=32px}} (Prelude Only) {{Icon|Material|Windwyrm's Greatsphere|text=0|size=32px}} (Unavailable in Prelude) {{Icon|Material|High Windwyrm's Tail|text=0|size=32px}} (Expert/Master only) {{Icon|Material|Orichalcum|text=0|size=32px}} (Expert/Master only) {{Icon|Material|High Windwyrm's Horn|text=0|size=32px}} (Master only)
| |
| − | | |
| − | ===[[High Mercury's Trial]]===
| |
| − | [[File:Banner High Mercury's Trial.png|350px|link=High Mercury's Trial]]
| |
| − | | |
| − | '''Unlock:''' Complete [[Mercury's Trial#Master|Mercury's Trial: Master]]<br />
| |
| − | '''Prologue:''' [[The Height of the Tides]]<br />
| |
| − | '''Primary Reward:''' {{Icon|Material|Waterwyrm's Glistscale|text=0|size=32px}} {{Icon|Material|Waterwyrm's Sphere|text=0|size=32px}} (Prelude Only) {{Icon|Material|Waterwyrm's Greatsphere|text=0|size=32px}} (Unavailable in Prelude) {{Icon|Material|High Waterwyrm's Tail|text=0|size=32px}} (Expert/Master only) {{Icon|Material|Orichalcum|text=0|size=32px}} (Expert/Master only) {{Icon|Material|High Waterwyrm's Horn|text=0|size=32px}} (Master only)
| |
| − | | |
| − | ===[[High Brunhilda's Trial]]===
| |
| − | [[File:Banner High Brunhilda's Trial.png|350px|link=High Brunhilda's Trial]]
| |
| − | | |
| − | '''Unlock:''' Complete [[Brunhilda's Trial#Master|Brunhilda's Trial: Master]]<br />
| |
| − | '''Prologue:''' [[The Height of the Flames]]<br />
| |
| − | '''Primary Reward:''' {{Icon|Material|Flamewyrm's Scaldscale|text=0|size=32px}} {{Icon|Material|Flamewyrm's Sphere|text=0|size=32px}} (Prelude Only) {{Icon|Material|Flamewyrm's Greatsphere|text=0|size=32px}} (Unavailable in Prelude) {{Icon|Material|High Flamewyrm's Tail|text=0|size=32px}} (Expert/Master only) {{Icon|Material|Orichalcum|text=0|size=32px}} (Expert/Master only) {{Icon|Material|High Flamewyrm's Horn|text=0|size=32px}} (Master only)
| |
| − | | |
| − | ===[[High Jupiter's Trial]]===
| |
| − | [[File:Banner High Jupiter's Trial.png|350px|link=High Jupiter's Trial]]
| |
| − | | |
| − | '''Unlock:''' Complete [[Jupiter's Trial#Master|Jupiter's Trial: Master]]<br />
| |
| − | '''Prologue:''' [[The Height of the Storms]]<br />
| |
| − | '''Primary Reward:''' {{Icon|Material|Lightwyrm's Glowscale|text=0|size=32px}} {{Icon|Material|Lightwyrm's Sphere|text=0|size=32px}} (Prelude Only) {{Icon|Material|Lightwyrm's Greatsphere|text=0|size=32px}} (Unavailable in Prelude) {{Icon|Material|High Lightwyrm's Tail|text=0|size=32px}} (Expert/Master only) {{Icon|Material|Orichalcum|text=0|size=32px}} (Expert/Master only) {{Icon|Material|High Lightwyrm's Horn|text=0|size=32px}} (Master only)
| |
| − | | |
| − | ===[[High Zodiark's Trial]]===
| |
| − | [[File:Banner High Zodiark's Trial.png|350px|link=High Zodiark's Trial]]
| |
| − | | |
| − | '''Unlock:''' Complete [[Zodiark's Trial#Master|Zodiark's Trial: Master]]<br />
| |
| − | '''Prologue:''' [[The Height of the Shadows]]<br />
| |
| − | '''Primary Reward:''' {{Icon|Material|Shadowwyrm's Darkscale|text=0|size=32px}} {{Icon|Material|Shadowwyrm's Sphere|text=0|size=32px}} (Prelude Only) {{Icon|Material|Shadowwyrm's Greatsphere|text=0|size=32px}} (Unavailable in Prelude) {{Icon|Material|High Shadowwyrm's Tail|text=0|size=32px}} (Expert/Master only) {{Icon|Material|Orichalcum|text=0|size=32px}} (Expert/Master only) {{Icon|Material|High Shadowwyrm's Horn|text=0|size=32px}} (Master only)
| |
| − | | |
| − | ==Imperial Onslaught==
| |
| − | [[File:Banner Imperial Onslaught.png|450px|link=]]
| |
| − | | |
| − | '''Unlock:''' Chapter 6/4-4<br />
| |
| − | '''Primary Reward:''' Dyrenell Coins, Insignias, Tablets<br />
| |
| − | '''Event Exchange Shop:''' [[Shop#Imperial Onslaught|Imperial Onslaught Exchange]]
| |
| − | | |
| − | <div style="font-style:italic;font-size:.9em;">Weapon Tablets drop from specific Onslaughts as follows:</div>
| |
| − | {| class="wikitable center"
| |
| − | |-
| |
| − | ! {{diagonal split header|Battle|Tablet}} ! Sword !! Blade !! Dagger!! Axe !! Lance !! Bow !! Wand !! Staff
| |
| − | |-
| |
| − | |{{MapElementIcon|Battle at Mount Adolla}}||✘||{{Ya}}||✘||✘||{{Ya}}||✘||{{Ya}}||✘
| |
| − | |-
| |
| − | |{{MapElementIcon|Battle at Myriage Lake}}||✘||✘||✘||{{Ya}}||✘||{{Ya}}||✘||{{Ya}}
| |
| − | |-
| |
| − | |{{MapElementIcon|Battle in Rovetelle Forest}}||{{Ya}}||✘||{{Ya}}||✘||✘||✘||✘||{{Ya}}
| |
| − | |-
| |
| − | |{{MapElementIcon|Battle in the Dornith Mountains}}||{{Ya}}||{{Ya}}||{{Ya}}||{{Ya}}||✘||✘||✘||✘
| |
| − | |-
| |
| − | |{{MapElementIcon|Battle at the Wartarch Ruins}}||✘||✘||✘||✘||{{Ya}}||{{Ya}}||{{Ya}}||{{Ya}}
| |
| − | |}
| |
| − | | |
| − | ===[[Battle at Mount Adolla]]===
| |
| − | [[File:Banner Battle at Mount Adolla.png|350px|link=Battle at Mount Adolla]]
| |
| − | | |
| − | '''Primary Reward:''' {{Icon|Material|Vermilion Insignia|text=0|size=32px}} {{Icon|Material|Royal Vermilion Insignia|text=0|size=32px}}
| |
| − | | |
| − | ===[[Battle at Myriage Lake]]===
| |
| − | [[File:Banner Battle at Myriage Lake.png|350px|link=Battle at Myriage Lake]]
| |
| − | | |
| − | '''Primary Reward:''' {{Icon|Material|Azure Insignia|text=0|size=32px}} {{Icon|Material|Royal Azure Insignia|text=0|size=32px}}
| |
| − | | |
| − | ===[[Battle in Rovetelle Forest]]===
| |
| − | [[File:Banner Battle in Rovetelle Forest.png|350px|link=Battle in Rovetelle Forest]]
| |
| − | | |
| − | '''Primary Reward:''' {{Icon|Material|Jade Insignia|text=0|size=32px}} {{Icon|Material|Royal Jade Insignia|text=0|size=32px}}
| |
| − | | |
| − | ===[[Battle in the Dornith Mountains]]===
| |
| − | [[File:Banner Battle in the Dornith Mountains.png|350px|link=Battle in the Dornith Mountains]]
| |
| − | | |
| − | '''Primary Reward:''' {{Icon|Material|Amber Insignia|text=0|size=32px}} {{Icon|Material|Royal Amber Insignia|text=0|size=32px}}
| |
| − | | |
| − | ===[[Battle at the Wartarch Ruins]]===
| |
| − | [[File:Banner Battle at the Wartarch Ruins.png|350px|link=Battle at the Wartarch Ruins]]
| |
| − | | |
| − | '''Primary Reward:''' {{Icon|Material|Violet Insignia|text=0|size=32px}} {{Icon|Material|Royal Violet Insignia|text=0|size=32px}}
| |
| − | | |
| − | {{:Event Quests/Challenge Events/Void Battles}} | |
| − | | |
| − | ==[[The Agito Uprising]]==
| |
| − | {{See|[[The Agito Uprising]]}}
| |
| − | {{:The Agito Uprising}}
| |
This page provides an overview on daily and limited time event quests.
Special Events
Events
Recurring Events
Daily Events are repeatable missions that serve as the primary source of most materials. Most Daily Event quest offer an additional Daily or Weekly reward for a limited number of completions. The limit is shared by all quests within a single category (Elemental Ruins has a pool of two daily bonuses that are shared by all 5 elemental ruins), but the rewards themselves are determined by the specific quest completed.
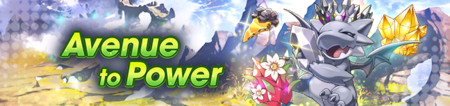
Unlock: Chapter 2/2-1
Primary Reward:
Error: Table Materials not found.
,  Mana
Mana
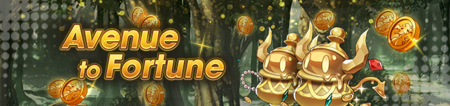
Unlock: Chapter 2/2-1
Primary Reward:  Rupies
Elemental Ruins

Unlock: Chapter 2/2-1
Primary Reward: Elemental Orbs
Event Exchange Shop: Standard Exchange
Beginner/Standard Difficulties are always available, while Expert Difficulty rotates on the following schedule.
| Sun |
Mon |
Tue |
Wed |
Thur |
Fri |
Sat
|
| All |
All |
 |
 |
 |
 |

|
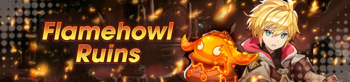
Primary Reward:
Error: Table Materials not found.
Error: Table Materials not found.
Error: Table Materials not found.

Primary Reward:
Error: Table Materials not found.
Error: Table Materials not found.
Error: Table Materials not found.

Primary Reward:
Error: Table Materials not found.
Error: Table Materials not found.
Error: Table Materials not found.
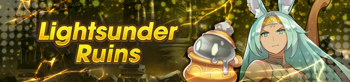
Primary Reward:
Error: Table Materials not found.
Error: Table Materials not found.
Error: Table Materials not found.

Primary Reward:
Error: Table Materials not found.
Error: Table Materials not found.
Error: Table Materials not found.
Event Quests/Challenge Events