Difference between revisions of "User:Canim/Sandbox3"
>Canim44 (Draft for revised Event Quests page) |
>Canim44 (Placed Void Battles in Tab) |
||
| Line 5: | Line 5: | ||
=Special Events= | =Special Events= | ||
{{:Events}} | {{:Events}} | ||
| − | |||
| − | |||
| − | |||
| − | |||
| − | |||
| − | |||
| − | |||
| − | |||
| − | |||
| − | |||
| − | |||
| − | |||
| − | |||
| − | |||
| − | |||
| − | |||
| − | |||
| − | |||
| − | |||
| − | |||
| − | |||
| − | |||
| − | |||
| − | |||
| − | |||
| − | |||
| − | |||
| − | |||
| − | |||
| − | |||
| − | |||
| − | |||
| − | |||
| − | |||
| − | |||
| − | |||
| − | |||
| − | |||
| − | |||
| − | |||
| − | |||
| − | |||
| − | |||
| − | |||
| − | |||
| − | |||
| − | |||
| − | |||
| − | |||
| − | |||
| − | |||
| − | |||
| − | |||
{{Tab/start}} | {{Tab/start}} | ||
| − | {{Tab/header| | + | {{Tab/header|Void Battles}} |
| − | |||
| − | |||
| − | |||
| − | |||
| − | |||
| − | |||
| − | |||
| − | |||
| − | |||
| − | |||
| − | |||
| − | |||
| − | |||
| − | |||
| − | |||
| − | |||
| − | |||
| − | |||
| − | |||
| − | |||
| − | |||
| − | |||
| − | |||
| − | |||
| − | |||
| − | |||
| − | |||
| − | |||
| − | |||
| − | |||
| − | |||
| − | |||
| − | |||
| − | |||
| − | |||
| − | |||
| − | |||
| − | |||
| − | |||
| − | |||
| − | |||
| − | |||
| − | |||
| − | |||
| − | |||
| − | |||
| − | |||
| − | |||
| − | |||
| − | |||
| − | |||
| − | |||
| − | |||
| − | |||
| − | |||
| − | |||
| − | |||
| − | |||
| − | |||
| − | |||
| − | |||
| − | |||
| − | |||
| − | |||
| − | |||
| − | |||
| − | |||
| − | |||
| − | |||
| − | |||
| − | |||
| − | |||
| − | |||
| − | |||
| − | |||
| − | |||
| − | |||
| − | |||
| − | |||
| − | |||
| − | |||
| − | |||
| − | |||
| − | |||
| − | |||
| − | |||
| − | |||
| − | |||
| − | |||
| − | |||
| − | |||
| − | |||
| − | |||
| − | |||
| − | |||
| − | |||
| − | |||
| − | |||
| − | |||
| − | |||
| − | |||
| − | |||
| − | |||
| − | |||
| − | |||
| − | |||
| − | |||
| − | |||
| − | |||
| − | |||
| − | |||
| − | |||
| − | |||
| − | |||
| − | |||
| − | |||
| − | |||
| − | |||
| − | |||
| − | |||
| − | |||
| − | |||
| − | |||
| − | |||
[[File:Banner_Void_Battles.png|450px|link=]] | [[File:Banner_Void_Battles.png|450px|link=]] | ||
| Line 252: | Line 75: | ||
</tabber> | </tabber> | ||
</div></div> | </div></div> | ||
| − | + | {{Tab/start}} | |
| − | + | {{Tab/header|9,000 Might Requirement}} | |
| − | + | {{Tab/start}} | |
| + | {{Tab/header|Scalding Shroom Strike}} | ||
[[File:Banner_Scalding_Shroom_Strike.png|350x82px|link=Scalding Shroom Strike]] | [[File:Banner_Scalding_Shroom_Strike.png|350x82px|link=Scalding Shroom Strike]] | ||
| Line 260: | Line 84: | ||
'''Primary Reward:''' {{Icon|Material|Solid Fungus|text=0|size=32px}} {{Icon|Material|Crimson Fungus|text=0|size=32px}} {{Icon|Material|Burning Spore|text=0|size=32px}} | '''Primary Reward:''' {{Icon|Material|Solid Fungus|text=0|size=32px}} {{Icon|Material|Crimson Fungus|text=0|size=32px}} {{Icon|Material|Burning Spore|text=0|size=32px}} | ||
| − | + | {{Tab/header|Gust Shroom Strike}} | |
| − | |||
[[File:Banner_Gust_Shroom_Strike.png|350x82px|link=Gust Shroom Strike]] | [[File:Banner_Gust_Shroom_Strike.png|350x82px|link=Gust Shroom Strike]] | ||
| Line 267: | Line 90: | ||
'''Primary Reward:''' {{Icon|Material|Solid Fungus|text=0|size=32px}} {{Icon|Material|Storm Fungus|text=0|size=32px}} {{Icon|Material|Spongy Spore|text=0|size=32px}} | '''Primary Reward:''' {{Icon|Material|Solid Fungus|text=0|size=32px}} {{Icon|Material|Storm Fungus|text=0|size=32px}} {{Icon|Material|Spongy Spore|text=0|size=32px}} | ||
| − | + | {{Tab/header|Wandering Shroom Strike}} | |
| − | |||
[[File:Banner_Wandering_Shroom_Strike.png|350x82px|link=Wandering Shroom Strike]] | [[File:Banner_Wandering_Shroom_Strike.png|350x82px|link=Wandering Shroom Strike]] | ||
| Line 274: | Line 96: | ||
'''Primary Reward:''' {{Icon|Material|Solid Fungus|text=0|size=32px}} {{Icon|Material|Shiny Spore|text=0|size=32px}} | '''Primary Reward:''' {{Icon|Material|Solid Fungus|text=0|size=32px}} {{Icon|Material|Shiny Spore|text=0|size=32px}} | ||
| − | + | {{Tab/header|Blazing Ghost Strike}} | |
| − | |||
[[File:Banner_Blazing Ghost_Strike.png|350x82px|link=Blazing Ghost Strike]] | [[File:Banner_Blazing Ghost_Strike.png|350x82px|link=Blazing Ghost Strike]] | ||
| Line 281: | Line 102: | ||
'''Primary Reward:''' {{Icon|Material|Old Cloth|text=0|size=32px}} {{Icon|Material|Floating Red Cloth|text=0|size=32px}} {{Icon|Material|Otherworldly Lantern|text=0|size=32px}} | '''Primary Reward:''' {{Icon|Material|Old Cloth|text=0|size=32px}} {{Icon|Material|Floating Red Cloth|text=0|size=32px}} {{Icon|Material|Otherworldly Lantern|text=0|size=32px}} | ||
| − | + | {{Tab/header|Violet Ghost Strike}} | |
| − | |||
[[File:Banner_Violet Ghost_Strike.png|350x82px|link=Violet Ghost Strike]] | [[File:Banner_Violet Ghost_Strike.png|350x82px|link=Violet Ghost Strike]] | ||
| Line 288: | Line 108: | ||
'''Primary Reward:''' {{Icon|Material|Old Cloth|text=0|size=32px}} {{Icon|Material|Floating Purple Cloth|text=0|size=32px}} {{Icon|Material|Shadowy Lantern|text=0|size=32px}} | '''Primary Reward:''' {{Icon|Material|Old Cloth|text=0|size=32px}} {{Icon|Material|Floating Purple Cloth|text=0|size=32px}} {{Icon|Material|Shadowy Lantern|text=0|size=32px}} | ||
| − | + | {{Tab/header|Lambent Ghost Strike}} | |
| − | |||
[[File:Banner Lambent Ghost Strike.png|350x82px|link=Lambent Ghost Strike]] | [[File:Banner Lambent Ghost Strike.png|350x82px|link=Lambent Ghost Strike]] | ||
| Line 295: | Line 114: | ||
'''Primary Reward:''' {{Icon|Material|Old Cloth|text=0|size=32px}} {{Icon|Material|Floating Yellow Cloth|text=0|size=32px}} {{Icon|Material|Unearthly Lantern|text=0|size=32px}} | '''Primary Reward:''' {{Icon|Material|Old Cloth|text=0|size=32px}} {{Icon|Material|Floating Yellow Cloth|text=0|size=32px}} {{Icon|Material|Unearthly Lantern|text=0|size=32px}} | ||
| − | + | {{Tab/end}} | |
| − | + | {{Tab/header|10,000 Might Requirement}} | |
| − | + | {{Tab/start}} | |
| + | {{Tab/header|Frost Hermit Strike}} | ||
[[File:Banner_Frost_Hermit_Strike.png|350x82px|link=Frost Hermit Strike]] | [[File:Banner_Frost_Hermit_Strike.png|350x82px|link=Frost Hermit Strike]] | ||
| Line 303: | Line 123: | ||
'''Primary Reward:''' {{Icon|Material|Goblin Thread|text=0|size=32px}} {{Icon|Material|Aromatic Wood|text=0|size=32px}} | '''Primary Reward:''' {{Icon|Material|Goblin Thread|text=0|size=32px}} {{Icon|Material|Aromatic Wood|text=0|size=32px}} | ||
| − | + | {{Tab/header|Twilight Hermit Strike}} | |
| − | |||
[[File:Banner_Twilight _Hermit_Strike.png|350x82px|link=Twilight Hermit Strike]] | [[File:Banner_Twilight _Hermit_Strike.png|350x82px|link=Twilight Hermit Strike]] | ||
| Line 310: | Line 129: | ||
'''Primary Reward:''' {{Icon|Material|Purple Thread|text=0|size=32px}} {{Icon|Material|Acoustic Wood|text=0|size=32px}} | '''Primary Reward:''' {{Icon|Material|Purple Thread|text=0|size=32px}} {{Icon|Material|Acoustic Wood|text=0|size=32px}} | ||
| − | + | {{Tab/header|Steel Golem Strike}} | |
[[File:Banner_Steel_Golem_Strike.png|350px|link=Steel Golem Strike]] | [[File:Banner_Steel_Golem_Strike.png|350px|link=Steel Golem Strike]] | ||
| Line 316: | Line 135: | ||
'''Primary Reward:''' {{Icon|Material|Steel Slab|text=0|size=32px}} {{Icon|Material|Golem Core|text=0|size=32px}} | '''Primary Reward:''' {{Icon|Material|Steel Slab|text=0|size=32px}} {{Icon|Material|Golem Core|text=0|size=32px}} | ||
| − | + | {{Tab/header|Amber Golem Strike}} | |
| − | |||
[[File:Banner_Amber_Golem_Strike.png|350x82px|link=Amber Golem Strike]] | [[File:Banner_Amber_Golem_Strike.png|350x82px|link=Amber Golem Strike]] | ||
| Line 323: | Line 141: | ||
'''Primary Reward:''' {{Icon|Material|Steel Slab|text=0|size=32px}} {{Icon|Material|Amber Slab|text=0|size=32px}} {{Icon|Material|Light Core|text=0|size=32px}} | '''Primary Reward:''' {{Icon|Material|Steel Slab|text=0|size=32px}} {{Icon|Material|Amber Slab|text=0|size=32px}} {{Icon|Material|Light Core|text=0|size=32px}} | ||
| − | + | {{Tab/header|Obsidian Golem Strike}} | |
| − | |||
[[File:Banner_Obsidian_Golem_Strike.png|350x82px|link=Obsidian Golem Strike]] | [[File:Banner_Obsidian_Golem_Strike.png|350x82px|link=Obsidian Golem Strike]] | ||
| Line 330: | Line 147: | ||
'''Primary Reward:''' {{Icon|Material|Steel Slab|text=0|size=32px}} {{Icon|Material|Obsidian Slab|text=0|size=32px}} {{Icon|Material|Dark Core|text=0|size=32px}} | '''Primary Reward:''' {{Icon|Material|Steel Slab|text=0|size=32px}} {{Icon|Material|Obsidian Slab|text=0|size=32px}} {{Icon|Material|Dark Core|text=0|size=32px}} | ||
| − | + | {{Tab/end}} | |
| − | + | {{Tab/header|11,000 Might Requirement}} | |
| − | + | {{Tab/start}} | |
| + | {{Tab/header|Catoblepas Anemos Strike}} | ||
[[File:Banner Catoblepas Anemos Strike.png|350x82px|link=Catoblepas Anemos Strike]] | [[File:Banner Catoblepas Anemos Strike.png|350x82px|link=Catoblepas Anemos Strike]] | ||
| Line 338: | Line 156: | ||
'''Primary Reward:''' {{Icon|Material|Catoblepas's Hoof|text=0|size=32px}} {{Icon|Material|Catoblepas's Stormeye|text=0|size=32px}} | '''Primary Reward:''' {{Icon|Material|Catoblepas's Hoof|text=0|size=32px}} {{Icon|Material|Catoblepas's Stormeye|text=0|size=32px}} | ||
| − | + | {{Tab/end}} | |
| − | + | {{Tab/header|12,000 Might Requirement}} | |
| − | + | {{Tab/start}} | |
| + | {{Tab/header|Eolian Phantom Strike}} | ||
[[File:Banner Eolian Phantom Strike.png|350x82px|link=Eolian Phantom Strike]] | [[File:Banner Eolian Phantom Strike.png|350x82px|link=Eolian Phantom Strike]] | ||
| Line 346: | Line 165: | ||
'''Primary Reward:''' {{Icon|Material|Soul Vestiges|text=0|size=32px}} {{Icon|Material|Eolian Soul|text=0|size=32px}} | '''Primary Reward:''' {{Icon|Material|Soul Vestiges|text=0|size=32px}} {{Icon|Material|Eolian Soul|text=0|size=32px}} | ||
| − | + | {{Tab/header|Smoldering Manticore Strike}} | |
| − | |||
[[File:Banner Smoldering Manticore Strike.png|350x82px|link=Smoldering Manticore Strike]] | [[File:Banner Smoldering Manticore Strike.png|350x82px|link=Smoldering Manticore Strike]] | ||
| Line 353: | Line 171: | ||
'''Primary Reward:''' {{Icon|Material|Raging Fang|text=0|size=32px}} {{Icon|Material|Smoldering Tail|text=0|size=32px}} | '''Primary Reward:''' {{Icon|Material|Raging Fang|text=0|size=32px}} {{Icon|Material|Smoldering Tail|text=0|size=32px}} | ||
| − | + | {{Tab/header|Greedy Manticore Strike}} | |
| − | |||
[[File:Banner Greedy Manticore Strike.png|350x82px|link=Greedy Manticore Strike]] | [[File:Banner Greedy Manticore Strike.png|350x82px|link=Greedy Manticore Strike]] | ||
| Line 360: | Line 177: | ||
'''Primary Reward:''' {{Icon|Material|Raging Fang|text=0|size=32px}} {{Icon|Material|Greedy Tail|text=0|size=32px}} | '''Primary Reward:''' {{Icon|Material|Raging Fang|text=0|size=32px}} {{Icon|Material|Greedy Tail|text=0|size=32px}} | ||
| − | + | {{Tab/header|Proud Manticore Strike}} | |
| − | |||
[[File:Banner Proud Manticore Strike.png|350x82px|link=Proud Manticore Strike]] | [[File:Banner Proud Manticore Strike.png|350x82px|link=Proud Manticore Strike]] | ||
| Line 367: | Line 183: | ||
'''Primary Reward:''' {{Icon|Material|Raging Fang|text=0|size=32px}} {{Icon|Material|Proud Tail|text=0|size=32px}} | '''Primary Reward:''' {{Icon|Material|Raging Fang|text=0|size=32px}} {{Icon|Material|Proud Tail|text=0|size=32px}} | ||
| − | + | {{Tab/header|Raging Manticore Strike}} | |
| − | |||
[[File:Banner Raging Manticore Strike.png|350x82px|link=Raging Manticore Strike]] | [[File:Banner Raging Manticore Strike.png|350x82px|link=Raging Manticore Strike]] | ||
| Line 374: | Line 189: | ||
'''Primary Reward:''' {{Icon|Material|Raging Fang|text=0|size=32px}} {{Icon|Material|Raging Tail|text=0|size=32px}} | '''Primary Reward:''' {{Icon|Material|Raging Fang|text=0|size=32px}} {{Icon|Material|Raging Tail|text=0|size=32px}} | ||
| − | + | {{Tab/header|Void Zephyr Strike}} | |
| − | |||
[[File:Banner Void Zephyr Strike.png|350x82px|link=Void Zephyr Strike]] | [[File:Banner Void Zephyr Strike.png|350x82px|link=Void Zephyr Strike]] | ||
| Line 383: | Line 197: | ||
'''Primary Reward (Expert):''' {{Icon|Material|Tempest Orb|text=0|size=32px}} {{Icon|Material|Great Feather|text=0|size=32px}} {{Icon|Material|Zephyr Rune|text=0|size=32px}} {{Icon|Material|Verdant Heart|text=0|size=32px}} {{Icon|Material|Longing Heart|text=0|size=32px}} {{Icon|Material|Squishums|text=0|size=32px}} | '''Primary Reward (Expert):''' {{Icon|Material|Tempest Orb|text=0|size=32px}} {{Icon|Material|Great Feather|text=0|size=32px}} {{Icon|Material|Zephyr Rune|text=0|size=32px}} {{Icon|Material|Verdant Heart|text=0|size=32px}} {{Icon|Material|Longing Heart|text=0|size=32px}} {{Icon|Material|Squishums|text=0|size=32px}} | ||
| − | + | {{Tab/header|Void Poseidon Strike}} | |
| − | |||
[[File:Banner Void Poseidon Strike.png|350x82px|link=Void Poseidon Strike]] | [[File:Banner Void Poseidon Strike.png|350x82px|link=Void Poseidon Strike]] | ||
| Line 392: | Line 205: | ||
'''Primary Reward (Expert):''' {{Icon|Material|Tsunami Orb|text=0|size=32px}} {{Icon|Material|Oceanic Fin|text=0|size=32px}} {{Icon|Material|Oceanic Crown|text=0|size=32px}} {{Icon|Material|Azure Heart|text=0|size=32px}} {{Icon|Material|Longing Heart|text=0|size=32px}} {{Icon|Material|Squishums|text=0|size=32px}} | '''Primary Reward (Expert):''' {{Icon|Material|Tsunami Orb|text=0|size=32px}} {{Icon|Material|Oceanic Fin|text=0|size=32px}} {{Icon|Material|Oceanic Crown|text=0|size=32px}} {{Icon|Material|Azure Heart|text=0|size=32px}} {{Icon|Material|Longing Heart|text=0|size=32px}} {{Icon|Material|Squishums|text=0|size=32px}} | ||
| − | + | {{Tab/header|Void Jeanne d'Arc Strike}} | |
| − | |||
[[File:Banner Void Jeanne d'Arc Strike.png|350x82px|link=Void Jeanne d'Arc Strike]] | [[File:Banner Void Jeanne d'Arc Strike.png|350x82px|link=Void Jeanne d'Arc Strike]] | ||
| Line 401: | Line 213: | ||
'''Primary Reward (Expert):''' {{Icon|Material|Resplendence Orb|text=0|size=32px}} {{Icon|Material|Necroblossom|text=0|size=32px}} {{Icon|Material|Abyssal Standard|text=0|size=32px}} {{Icon|Material|Coronal Heart|text=0|size=32px}} {{Icon|Material|Longing Heart|text=0|size=32px}} {{Icon|Material|Squishums|text=0|size=32px}} | '''Primary Reward (Expert):''' {{Icon|Material|Resplendence Orb|text=0|size=32px}} {{Icon|Material|Necroblossom|text=0|size=32px}} {{Icon|Material|Abyssal Standard|text=0|size=32px}} {{Icon|Material|Coronal Heart|text=0|size=32px}} {{Icon|Material|Longing Heart|text=0|size=32px}} {{Icon|Material|Squishums|text=0|size=32px}} | ||
| − | + | {{Tab/header|Void Nidhogg Strike}} | |
| − | |||
[[File:Banner Void Nidhogg Strike.png|350x82px|link=Void Nidhogg Strike]] | [[File:Banner Void Nidhogg Strike.png|350x82px|link=Void Nidhogg Strike]] | ||
| Line 410: | Line 221: | ||
'''Primary Reward (Expert):''' {{Icon|Material|Abaddon Orb|text=0|size=32px}} {{Icon|Material|Ruinous Horn|text=0|size=32px}} {{Icon|Material|Ruinous Wing|text=0|size=32px}} {{Icon|Material|Ebony Heart|text=0|size=32px}} {{Icon|Material|Longing Heart|text=0|size=32px}} {{Icon|Material|Squishums|text=0|size=32px}} | '''Primary Reward (Expert):''' {{Icon|Material|Abaddon Orb|text=0|size=32px}} {{Icon|Material|Ruinous Horn|text=0|size=32px}} {{Icon|Material|Ruinous Wing|text=0|size=32px}} {{Icon|Material|Ebony Heart|text=0|size=32px}} {{Icon|Material|Longing Heart|text=0|size=32px}} {{Icon|Material|Squishums|text=0|size=32px}} | ||
| − | + | {{Tab/end}} | |
| − | + | {{Tab/header|12,500 Might Requirement}} | |
| − | + | {{Tab/start}} | |
| + | {{Tab/header|Void Agni Strike}} | ||
[[File:Banner_Void_Agni_Strike.png|350x82px|link=Void Agni Strike]] | [[File:Banner_Void_Agni_Strike.png|350x82px|link=Void Agni Strike]] | ||
| Line 420: | Line 232: | ||
'''Primary Reward (Expert):''' {{Icon|Material|Incandescence Orb|text=0|size=32px}} {{Icon|Material|Blazing Horn|text=0|size=32px}} {{Icon|Material|Blazing Ember|text=0|size=32px}} {{Icon|Material|Burning Heart|text=0|size=32px}} {{Icon|Material|Longing Heart|text=0|size=32px}} {{Icon|Material|Squishums|text=0|size=32px}} | '''Primary Reward (Expert):''' {{Icon|Material|Incandescence Orb|text=0|size=32px}} {{Icon|Material|Blazing Horn|text=0|size=32px}} {{Icon|Material|Blazing Ember|text=0|size=32px}} {{Icon|Material|Burning Heart|text=0|size=32px}} {{Icon|Material|Longing Heart|text=0|size=32px}} {{Icon|Material|Squishums|text=0|size=32px}} | ||
| − | + | {{Tab/end}} | |
| − | + | {{Tab/header|13,000 Might Requirement}} | |
| − | + | {{Tab/start}} | |
| + | {{Tab/header|Volcanic Chimera Strike}} | ||
[[File:Banner Volcanic Chimera Strike.png|350x82px|link=Volcanic Chimera Strike]] | [[File:Banner Volcanic Chimera Strike.png|350x82px|link=Volcanic Chimera Strike]] | ||
| Line 430: | Line 243: | ||
'''Primary Reward (Expert):''' {{Icon|Material|Incandescence Orb|text=0|size=32px}} {{Icon|Material|Volcanic Mane|text=0|size=32px}} {{Icon|Material|Volcanic Claw|text=0|size=32px}} {{Icon|Material|Volcanic Horn|text=0|size=32px}} {{Icon|Material|Squishums|text=0|size=32px}} | '''Primary Reward (Expert):''' {{Icon|Material|Incandescence Orb|text=0|size=32px}} {{Icon|Material|Volcanic Mane|text=0|size=32px}} {{Icon|Material|Volcanic Claw|text=0|size=32px}} {{Icon|Material|Volcanic Horn|text=0|size=32px}} {{Icon|Material|Squishums|text=0|size=32px}} | ||
| − | + | {{Tab/header|Ebon Chimera Strike}} | |
| − | |||
[[File:Banner Volcanic Ebon Strike.png|350x82px|link=Ebon Chimera Strike]] | [[File:Banner Volcanic Ebon Strike.png|350x82px|link=Ebon Chimera Strike]] | ||
| Line 439: | Line 251: | ||
'''Primary Reward (Expert):''' {{Icon|Material|Abaddon Orb|text=0|size=32px}} {{Icon|Material|Ebon Mane|text=0|size=32px}} {{Icon|Material|Ebon Claw|text=0|size=32px}} {{Icon|Material|Ebon Horn|text=0|size=32px}} {{Icon|Material|Squishums|text=0|size=32px}} | '''Primary Reward (Expert):''' {{Icon|Material|Abaddon Orb|text=0|size=32px}} {{Icon|Material|Ebon Mane|text=0|size=32px}} {{Icon|Material|Ebon Claw|text=0|size=32px}} {{Icon|Material|Ebon Horn|text=0|size=32px}} {{Icon|Material|Squishums|text=0|size=32px}} | ||
| + | {{Tab/end}} | ||
| + | {{Tab/end}} | ||
| + | <!--{{:Astral Raids}}--> | ||
| + | |||
| + | =Recurring Events= | ||
| + | Daily Events are repeatable missions that serve as the primary source of most [[materials]]. Most Daily Event quest offer an additional Daily or Weekly reward for a limited number of completions. The limit is shared by all quests within a single category (Elemental Ruins has a pool of two daily bonuses that are shared by all 5 elemental ruins), but the rewards themselves are determined by the specific quest completed. | ||
| + | {{Tab/start}} | ||
| + | {{Tab/header|Avenue to Power}} | ||
| + | [[File:Banner Avenue to Power.png|450px|link=Avenue to Power]] | ||
| + | |||
| + | '''Unlock:''' Chapter 2/2-1<br /> | ||
| + | '''Primary Reward:''' {{Gold Crystal-}}, {{Mana-}} | ||
| + | {{Tab/header|Avenue to Fortune}} | ||
| + | [[File:Banner Avenue to Fortune.png|450px|link=Avenue to Fortune]] | ||
| + | |||
| + | '''Unlock:''' Chapter 2/2-1<br /> | ||
| + | '''Primary Reward:''' {{Rupies-}} | ||
| + | {{Tab/header|Elemental Ruins}} | ||
| + | [[File:Banner Elemental Ruins.png|450px|link=]] | ||
| + | |||
| + | '''Unlock:''' Chapter 2/2-1<br /> | ||
| + | '''Primary Reward:''' Elemental Orbs<br /> | ||
| + | '''Event Exchange Shop:''' [[Shop#Standard|Standard Exchange]] | ||
| + | <div style="font-style:italic;font-size:.9em;">Beginner/Standard Difficulties are always available, while Expert Difficulty rotates on the following schedule.</div> | ||
| + | {| class="wikitable center" | ||
| + | |- | ||
| + | ! Sun !! Mon !! Tue !! Wed !! Thur !! Fri !! Sat | ||
| + | |- | ||
| + | | All || All || {{InlineIcon|Icon Element|Flame}} || {{InlineIcon|Icon Element|Water}} || {{InlineIcon|Icon Element|Wind}} || {{InlineIcon|Icon Element|Light}} || {{InlineIcon|Icon Element|Shadow}} | ||
| + | |} | ||
| + | {{Tab/start}} | ||
| + | {{Tab/header|Flamehowl Ruins}} | ||
| + | [[File:Banner Flamehowl Ruins.png|350px|link=Flamehowl Ruins]] | ||
| + | |||
| + | '''Primary Reward:''' {{Icon|Material|Flame Orb|text=0|size=32px}} {{Icon|Material|Blaze Orb|text=0|size=32px}} {{Icon|Material|Inferno Orb|text=0|size=32px}} | ||
| + | {{Tab/header|Waterscour Ruins}} | ||
| + | [[File:Banner Waterscour Ruins.png|350px|link=Waterscour Ruins]] | ||
| + | |||
| + | '''Primary Reward:''' {{Icon|Material|Water Orb|text=0|size=32px}} {{Icon|Material|Stream Orb|text=0|size=32px}} {{Icon|Material|Deluge Orb|text=0|size=32px}} | ||
| + | {{Tab/header|Windmaul Ruins}} | ||
| + | [[File:Banner Windmaul Ruins.png|350px|link=Windmaul Ruins]] | ||
| + | |||
| + | '''Primary Reward:''' {{Icon|Material|Wind Orb|text=0|size=32px}} {{Icon|Material|Storm Orb|text=0|size=32px}} {{Icon|Material|Maelstrom Orb|text=0|size=32px}} | ||
| + | {{Tab/header|Lightsunder Ruins}} | ||
| + | [[File:Banner Lightsunder Ruins.png|350px|link=Lightsunder Ruins]] | ||
| + | |||
| + | '''Primary Reward:''' {{Icon|Material|Light Orb|text=0|size=32px}} {{Icon|Material|Radiance Orb|text=0|size=32px}} {{Icon|Material|Refulgence Orb|text=0|size=32px}} | ||
| + | {{Tab/header|Shadowsteep Ruins}} | ||
| + | [[File:Banner Shadowsteep Ruins.png|350px|link=Shadowsteep Ruins]] | ||
| + | |||
| + | '''Primary Reward:''' {{Icon|Material|Shadow Orb|text=0|size=32px}} {{Icon|Material|Nightfall Orb|text=0|size=32px}} {{Icon|Material|Nether Orb|text=0|size=32px}} | ||
| + | {{Tab/end}} | ||
| + | {{Tab/end}} | ||
| + | |||
| + | =Challenge Events= | ||
| + | {{Tab/start}} | ||
| + | {{Tab/header|Dragon Trials}} | ||
| + | [[File:Banner Dragon Trials.png|450px|link=]] | ||
| + | |||
| + | '''Unlock:''' Chapter 3/4-4<br /> | ||
| + | '''Primary Reward:''' Dragon Scales/Wyrm Spheres<br /> | ||
| + | '''Event Exchange Shop:''' [[Shop#Dragon Trials|Dragon Trials Exchange]] | ||
| + | {{Tab/start}} | ||
| + | {{Tab/header|Midgardsormr's Trial}} | ||
| + | [[File:Banner Midgardsormr's Trial.png|350px|link=Midgardsormr's Trial]] | ||
| + | |||
| + | '''Unlock:''' Chapter 3/4-4<br /> | ||
| + | '''Primary Reward:''' {{Icon|Material|Windwyrm's Scale|text=0|size=32px}} {{Icon|Material|Windwyrm's Squallscale|text=0|size=32px}} {{Icon|Material|Windwyrm's Sphere|text=0|size=32px}} | ||
| + | {{Tab/header|Mercury's Trial}} | ||
| + | [[File:Banner Mercury's Trial.png|350px|link=Mercury's Trial]] | ||
| + | |||
| + | '''Unlock:''' Chapter 3/4-4<br /> | ||
| + | '''Primary Reward:''' {{Icon|Material|Waterwyrm's Scale|text=0|size=32px}} {{Icon|Material|Waterwyrm's Glistscale|text=0|size=32px}} {{Icon|Material|Waterwyrm's Sphere|text=0|size=32px}} | ||
| + | {{Tab/header|Brunhilda's Trial}} | ||
| + | [[File:Banner Brunhilda's Trial.png|350px|link=Brunhilda's Trial]] | ||
| + | |||
| + | '''Unlock:''' Chapter 3/4-4<br /> | ||
| + | '''Primary Reward:''' {{Icon|Material|Flamewyrm's Scale|text=0|size=32px}} {{Icon|Material|Flamewyrm's Scaldscale|text=0|size=32px}} {{Icon|Material|Flamewyrm's Sphere|text=0|size=32px}} | ||
| + | {{Tab/header|Jupiter's Trial}} | ||
| + | [[File:Banner Jupiter's Trial.png|350px|link=Jupiter's Trial]] | ||
| + | |||
| + | '''Unlock:''' Chapter 4/5-4<br /> | ||
| + | '''Primary Reward:''' {{Icon|Material|Lightwyrm's Scale|text=0|size=32px}} {{Icon|Material|Lightwyrm's Glowscale|text=0|size=32px}} {{Icon|Material|Lightwyrm's Sphere|text=0|size=32px}} | ||
| + | {{Tab/header|Zodiark's Trial}} | ||
| + | [[File:Banner Zodiark's Trial.png|350px|link=Zodiark's Trial]] | ||
| + | |||
| + | '''Unlock:''' Chapter 5/4-4<br /> | ||
| + | '''Primary Reward:''' {{Icon|Material|Shadowwyrm's Scale|text=0|size=32px}} {{Icon|Material|Shadowwyrm's Darkscale|text=0|size=32px}} {{Icon|Material|Shadowwyrm's Sphere|text=0|size=32px}} | ||
| + | {{Tab/end}} | ||
| + | {{Tab/header|The Imperial Onslaught}} | ||
| + | [[File:Banner Imperial Onslaught.png|450px|link=]] | ||
| + | |||
| + | '''Unlock:''' Chapter 6/4-4<br /> | ||
| + | '''Primary Reward:''' Dyrenell Coins, Insignias, Tablets<br /> | ||
| + | '''Event Exchange Shop:''' [[Shop#Imperial Onslaught|Imperial Onslaught Exchange]] | ||
| + | |||
| + | <div style="font-style:italic;font-size:.9em;">Weapon Tablets drop from specific Onslaughts as follows:</div> | ||
| + | {| class="wikitable center" | ||
| + | |- | ||
| + | ! {{diagonal split header|Battle|Tablet}} ! Sword !! Blade !! Dagger!! Axe !! Lance !! Bow !! Wand !! Staff | ||
| + | |- | ||
| + | |{{MapElementIcon|Battle at Mount Adolla}}||✘||{{Ya}}||✘||✘||{{Ya}}||✘||{{Ya}}||✘ | ||
| + | |- | ||
| + | |{{MapElementIcon|Battle at Myriage Lake}}||✘||✘||✘||{{Ya}}||✘||{{Ya}}||✘||{{Ya}} | ||
| + | |- | ||
| + | |{{MapElementIcon|Battle in Rovetelle Forest}}||{{Ya}}||✘||{{Ya}}||✘||✘||✘||✘||{{Ya}} | ||
| + | |- | ||
| + | |{{MapElementIcon|Battle in the Dornith Mountains}}||{{Ya}}||{{Ya}}||{{Ya}}||{{Ya}}||✘||✘||✘||✘ | ||
| + | |- | ||
| + | |{{MapElementIcon|Battle at the Wartarch Ruins}}||✘||✘||✘||✘||{{Ya}}||{{Ya}}||{{Ya}}||{{Ya}} | ||
| + | |} | ||
| + | {{Tab/start}} | ||
| + | {{Tab/header|Battle at Mount Adolla}} | ||
| + | [[File:Banner Battle at Mount Adolla.png|350px|link=Battle at Mount Adolla]] | ||
| + | |||
| + | '''Primary Reward:''' {{Icon|Material|Vermilion Insignia|text=0|size=32px}} {{Icon|Material|Royal Vermilion Insignia|text=0|size=32px}} | ||
| + | {{Tab/header|Battle at Myriage Lake}} | ||
| + | [[File:Banner Battle at Myriage Lake.png|350px|link=Battle at Myriage Lake]] | ||
| + | |||
| + | '''Primary Reward:''' {{Icon|Material|Azure Insignia|text=0|size=32px}} {{Icon|Material|Royal Azure Insignia|text=0|size=32px}} | ||
| + | {{Tab/header|Battle in Rovetelle Forest}} | ||
| + | [[File:Banner Battle in Rovetelle Forest.png|350px|link=Battle in Rovetelle Forest]] | ||
| + | |||
| + | '''Primary Reward:''' {{Icon|Material|Jade Insignia|text=0|size=32px}} {{Icon|Material|Royal Jade Insignia|text=0|size=32px}} | ||
| + | {{Tab/header|Battle in the Dornith Mountains}} | ||
| + | [[File:Banner Battle in the Dornith Mountains.png|350px|link=Battle in the Dornith Mountains]] | ||
| + | |||
| + | '''Primary Reward:''' {{Icon|Material|Amber Insignia|text=0|size=32px}} {{Icon|Material|Royal Amber Insignia|text=0|size=32px}} | ||
| + | {{Tab/header|Battle at the Wartarch Ruins}} | ||
| + | [[File:Banner Battle at the Wartarch Ruins.png|350px|link=Battle at the Wartarch Ruins]] | ||
| + | |||
| + | '''Primary Reward:''' {{Icon|Material|Violet Insignia|text=0|size=32px}} {{Icon|Material|Royal Violet Insignia|text=0|size=32px}} | ||
| + | {{Tab/end}} | ||
| + | {{Tab/header|Advanced Dragon Trials}} | ||
| + | [[File:Banner Advanced Dragon Trials.png|450px|link=]] | ||
| + | |||
| + | '''Unlock:''' Complete Master Difficulty Dragon Trial<br /> | ||
| + | '''Primary Reward:''' Wyrm Greatspheres, High Dragon Weapon Materials<br /> | ||
| + | '''Event Exchange Shop:''' [[Shop#Advanced Dragon Trials|Advanced Dragon Trials Exchange]] | ||
| + | |||
| + | <div style="font-style:italic;font-size:.9em;">Standard/Expert Difficulties are always available, while Master Difficulty rotates on the following schedule:</div> | ||
| + | {{MasterHDTSchedule}} | ||
| + | {{Tab/start}} | ||
| + | {{Tab/header|High Midgardsormr's Trial}} | ||
| + | [[File:Banner High Midgardsormr's Trial.png|350px|link=High Midgardsormr's Trial]] | ||
| + | |||
| + | '''Unlock:''' Complete [[Midgardsormr's Trial#Master|Midgardsormr's Trial: Master]]<br /> | ||
| + | '''Prologue:''' [[The Height of the Tempest]]<br /> | ||
| + | '''Primary Reward:''' {{Icon|Material|Windwyrm's Squallscale|text=0|size=32px}} {{Icon|Material|Windwyrm's Sphere|text=0|size=32px}} (Prelude Only) {{Icon|Material|Windwyrm's Greatsphere|text=0|size=32px}} (Unavailable in Prelude) {{Icon|Material|High Windwyrm's Tail|text=0|size=32px}} (Expert/Master only) {{Icon|Material|Orichalcum|text=0|size=32px}} (Expert/Master only) {{Icon|Material|High Windwyrm's Horn|text=0|size=32px}} (Master only) | ||
| + | {{Tab/header|High Mercury's Trial}} | ||
| + | [[File:Banner High Mercury's Trial.png|350px|link=High Mercury's Trial]] | ||
| + | |||
| + | '''Unlock:''' Complete [[Mercury's Trial#Master|Mercury's Trial: Master]]<br /> | ||
| + | '''Prologue:''' [[The Height of the Tides]]<br /> | ||
| + | '''Primary Reward:''' {{Icon|Material|Waterwyrm's Glistscale|text=0|size=32px}} {{Icon|Material|Waterwyrm's Sphere|text=0|size=32px}} (Prelude Only) {{Icon|Material|Waterwyrm's Greatsphere|text=0|size=32px}} (Unavailable in Prelude) {{Icon|Material|High Waterwyrm's Tail|text=0|size=32px}} (Expert/Master only) {{Icon|Material|Orichalcum|text=0|size=32px}} (Expert/Master only) {{Icon|Material|High Waterwyrm's Horn|text=0|size=32px}} (Master only) | ||
| + | {{Tab/header|High Brunhilda's Trial}} | ||
| + | [[File:Banner High Brunhilda's Trial.png|350px|link=High Brunhilda's Trial]] | ||
| + | |||
| + | '''Unlock:''' Complete [[Brunhilda's Trial#Master|Brunhilda's Trial: Master]]<br /> | ||
| + | '''Prologue:''' [[The Height of the Flames]]<br /> | ||
| + | '''Primary Reward:''' {{Icon|Material|Flamewyrm's Scaldscale|text=0|size=32px}} {{Icon|Material|Flamewyrm's Sphere|text=0|size=32px}} (Prelude Only) {{Icon|Material|Flamewyrm's Greatsphere|text=0|size=32px}} (Unavailable in Prelude) {{Icon|Material|High Flamewyrm's Tail|text=0|size=32px}} (Expert/Master only) {{Icon|Material|Orichalcum|text=0|size=32px}} (Expert/Master only) {{Icon|Material|High Flamewyrm's Horn|text=0|size=32px}} (Master only) | ||
| + | {{Tab/header|High Jupiter's Trial}} | ||
| + | [[File:Banner High Jupiter's Trial.png|350px|link=High Jupiter's Trial]] | ||
| + | |||
| + | '''Unlock:''' Complete [[Jupiter's Trial#Master|Jupiter's Trial: Master]]<br /> | ||
| + | '''Prologue:''' [[The Height of the Storms]]<br /> | ||
| + | '''Primary Reward:''' {{Icon|Material|Lightwyrm's Glowscale|text=0|size=32px}} {{Icon|Material|Lightwyrm's Sphere|text=0|size=32px}} (Prelude Only) {{Icon|Material|Lightwyrm's Greatsphere|text=0|size=32px}} (Unavailable in Prelude) {{Icon|Material|High Lightwyrm's Tail|text=0|size=32px}} (Expert/Master only) {{Icon|Material|Orichalcum|text=0|size=32px}} (Expert/Master only) {{Icon|Material|High Lightwyrm's Horn|text=0|size=32px}} (Master only) | ||
| + | {{Tab/header|High Zodiark's Trial}} | ||
| + | [[File:Banner High Zodiark's Trial.png|350px|link=High Zodiark's Trial]] | ||
| + | |||
| + | '''Unlock:''' Complete [[Zodiark's Trial#Master|Zodiark's Trial: Master]]<br /> | ||
| + | '''Prologue:''' [[The Height of the Shadows]]<br /> | ||
| + | '''Primary Reward:''' {{Icon|Material|Shadowwyrm's Darkscale|text=0|size=32px}} {{Icon|Material|Shadowwyrm's Sphere|text=0|size=32px}} (Prelude Only) {{Icon|Material|Shadowwyrm's Greatsphere|text=0|size=32px}} (Unavailable in Prelude) {{Icon|Material|High Shadowwyrm's Tail|text=0|size=32px}} (Expert/Master only) {{Icon|Material|Orichalcum|text=0|size=32px}} (Expert/Master only) {{Icon|Material|High Shadowwyrm's Horn|text=0|size=32px}} (Master only) | ||
| + | {{Tab/end}} | ||
| + | {{Tab/header|The Agito Uprising}} | ||
| + | {{See|[[The Agito Uprising]]}} | ||
| + | {{:The Agito Uprising}} | ||
| + | {{Tab/end}} | ||
| + | {{Tab/end}} | ||
Revision as of 16:11, 18 February 2020
This page provides an overview on daily and limited time event quests.
Special Events
Unlock: Chapter 7/5-6
Event Exchange Shop: Void Battles Exchange
Current Schedule
Day Quest
|
Mon | Tue | Wed | Thu | Fri | Sat | Sun |
|---|---|---|---|---|---|---|---|
| [[File:Icon Element Error: Table Quests not found. .png|19px|middle|link=]] Scalding Shroom Strike |
✔ | ✔ | ✔ | x2 | ✔ | ✔ | ✔ |
| [[File:Icon Element Error: Table Quests not found. .png|19px|middle|link=]] Gust Shroom Strike |
✔ | x2 | ✔ | ✔ | ✔ | ✔ | ✔ |
| [[File:Icon Element Error: Table Quests not found. .png|19px|middle|link=]] Wandering Shroom Strike |
✔ | ✔ | ✔ | ✔ | ✔ | ✔ | x2 |
| [[File:Icon Element Error: Table Quests not found. .png|19px|middle|link=]] Blazing Ghost Strike |
x2 | ✔ | ✔ | ✔ | ✔ | ✔ | ✔ |
| [[File:Icon Element Error: Table Quests not found. .png|19px|middle|link=]] Cerulean Ghost Strike |
✔ | ✔ | ✔ | ✔ | x2 | ✔ | ✔ |
| [[File:Icon Element Error: Table Quests not found. .png|19px|middle|link=]] Lambent Ghost Strike |
✔ | ✔ | x2 | ✔ | ✔ | ✔ | ✔ |
| [[File:Icon Element Error: Table Quests not found. .png|19px|middle|link=]] Violet Ghost Strike |
✔ | ✔ | ✔ | ✔ | ✔ | x2 | ✔ |
| [[File:Icon Element Error: Table Quests not found. .png|19px|middle|link=]] Frost Hermit Strike |
✔ | x2 | ✔ | ✔ | ✔ | ✔ | ✔ |
| [[File:Icon Element Error: Table Quests not found. .png|19px|middle|link=]] Twilight Hermit Strike |
✔ | ✔ | ✔ | x2 | ✔ | ✔ | ✔ |
| [[File:Icon Element Error: Table Quests not found. .png|19px|middle|link=]] Steel Golem Strike |
✔ | ✔ | x2 | ✔ | ✔ | ✔ | ✔ |
| [[File:Icon Element Error: Table Quests not found. .png|19px|middle|link=]] Amber Golem Strike |
x2 | ✔ | ✔ | ✔ | ✔ | ✔ | ✔ |
| [[File:Icon Element Error: Table Quests not found. .png|19px|middle|link=]] Obsidian Golem Strike |
✔ | ✔ | ✔ | ✔ | ✔ | ✔ | x2 |
| [[File:Icon Element Error: Table Quests not found. .png|19px|middle|link=]] Catoblepas Fotia Strike |
✔ | ✔ | ✔ | ✔ | ✔ | ✔ | x2 |
| [[File:Icon Element Error: Table Quests not found. .png|19px|middle|link=]] Catoblepas Anemos Strike |
✔ | ✔ | ✔ | ✔ | x2 | ✔ | ✔ |
| [[File:Icon Element Error: Table Quests not found. .png|19px|middle|link=]] Catoblepas Skia Strike |
✔ | ✔ | x2 | ✔ | ✔ | ✔ | ✔ |
| [[File:Icon Element Error: Table Quests not found. .png|19px|middle|link=]] Infernal Phantom Strike |
✔ | x2 | ✔ | ✔ | ✔ | ✔ | ✔ |
| [[File:Icon Element Error: Table Quests not found. .png|19px|middle|link=]] Abyssal Phantom Strike |
✔ | ✔ | ✔ | x2 | ✔ | ✔ | ✔ |
| [[File:Icon Element Error: Table Quests not found. .png|19px|middle|link=]] Eolian Phantom Strike |
✔ | ✔ | ✔ | ✔ | ✔ | x2 | ✔ |
| [[File:Icon Element Error: Table Quests not found. .png|19px|middle|link=]] Smoldering Manticore Strike |
✔ | ✔ | ✔ | ✔ | x2 | ✔ | ✔ |
| [[File:Icon Element Error: Table Quests not found. .png|19px|middle|link=]] Greedy Manticore Strike |
✔ | ✔ | x2 | ✔ | ✔ | ✔ | ✔ |
| [[File:Icon Element Error: Table Quests not found. .png|19px|middle|link=]] Proud Manticore Strike |
✔ | ✔ | ✔ | ✔ | ✔ | x2 | ✔ |
| [[File:Icon Element Error: Table Quests not found. .png|19px|middle|link=]] Raging Manticore Strike |
x2 | ✔ | ✔ | ✔ | ✔ | ✔ | ✔ |
| [[File:Icon Element Error: Table Quests not found. .png|19px|middle|link=]] Void Zephyr Strike |
✘ | ✘ | ✔ | ✘ | x2 | ✘ | x2 |
| [[File:Icon Element Error: Table Quests not found. .png|19px|middle|link=]] Void Poseidon Strike |
✘ | x2 | ✘ | ✘ | ✔ | ✘ | x2 |
| [[File:Icon Element Error: Table Quests not found. .png|19px|middle|link=]] Void Jeanne d'Arc Strike |
✔ | ✘ | x2 | ✘ | ✘ | x2 | ✘ |
| [[File:Icon Element Error: Table Quests not found. .png|19px|middle|link=]] Void Nidhogg Strike |
x2 | ✘ | ✘ | x2 | ✘ | ✔ | ✘ |
| [[File:Icon Element Error: Table Quests not found. .png|19px|middle|link=]] Void Agni Strike |
✘ | ✔ | ✘ | x2 | ✘ | x2 | ✘ |
| [[File:Icon Element Error: Table Quests not found. .png|19px|middle|link=]] Volcanic Chimera Strike |
✘ | ✘ | ✔ | ✘ | x2 | ✘ | x2 |
| [[File:Icon Element Error: Table Quests not found. .png|19px|middle|link=]] Tidal Chimera Strike |
x2 | ✘ | x2 | ✘ | ✘ | ✔ | ✘ |
| [[File:Icon Element Error: Table Quests not found. .png|19px|middle|link=]] Tempest Chimera Strike |
x2 | ✘ | ✘ | ✔ | ✘ | x2 | ✘ |
| [[File:Icon Element Error: Table Quests not found. .png|19px|middle|link=]] Luminous Chimera Strike |
✘ | x2 | ✘ | x2 | ✘ | ✘ | ✔ |
| [[File:Icon Element Error: Table Quests not found. .png|19px|middle|link=]] Ebon Chimera Strike |
✘ | x2 | ✘ | ✘ | x2 | ✘ | ✔ |
Current Day: Friday Not Friday?
Time Remaining:
Schedule Archive
Day Boss
|
Mon | Tue | Wed | Thur | Fri | Sat | Sun |
|---|---|---|---|---|---|---|---|
| [[File:Icon Element Error: Table Quests not found. .png|19px|middle|link=]] Wandering Shroom |
✔ | ✔ | ✔ | ✔ | ✔ | ✔ | ✔ |
| [[File:Icon Element Error: Table Quests not found. .png|19px|middle|link=]] Steel Golem |
✔ | ✘ | ✔ | ✘ | ✔ | ✘ | ✔ |
| [[File:Icon Element Error: Table Quests not found. .png|19px|middle|link=]] Void Zephyr |
✘ | ✘ | ✔ | ✘ | ✘ | ✔ | ✔ |
| [[File:Icon Element Error: Table Quests not found. .png|19px|middle|link=]] Raging Manticore |
✘ | ✔ | ✘ | ✔ | ✘ | ✔ | ✘ |
Day Boss
|
Mon | Tue | Wed | Thur | Fri | Sat | Sun |
|---|---|---|---|---|---|---|---|
| [[File:Icon Element Error: Table Quests not found. .png|19px|middle|link=]] Wandering Shroom |
✔ | ✔ | ✔ | ✔ | ✔ | ✔ | ✔ |
| [[File:Icon Element Error: Table Quests not found. .png|19px|middle|link=]] Blazing Ghost |
✔ | ✔ | ✘ | ✔ | ✔ | ✘ | ✔ |
| [[File:Icon Element Error: Table Quests not found. .png|19px|middle|link=]] Frost Hermit |
✘ | ✔ | ✔ | ✔ | ✔ | ✔ | ✔ |
| [[File:Icon Element Error: Table Quests not found. .png|19px|middle|link=]] Steel Golem |
✔ | ✘ | ✔ | ✘ | ✔ | ✘ | ✔ |
| [[File:Icon Element Error: Table Quests not found. .png|19px|middle|link=]] Obsidian Golem |
✔ | ✘ | ✔ | ✔ | ✘ | ✔ | ✔ |
| [[File:Icon Element Error: Table Quests not found. .png|19px|middle|link=]] Void Zephyr |
✘ | ✘ | ✔ | ✘ | ✘ | ✔ | ✔ |
| [[File:Icon Element Error: Table Quests not found. .png|19px|middle|link=]] Raging Manticore |
✘ | ✔ | ✘ | ✔ | ✘ | ✔ | ✘ |
Day Boss
|
Mon | Tue | Wed | Thur | Fri | Sat | Sun |
|---|---|---|---|---|---|---|---|
| [[File:Icon Element Error: Table Quests not found. .png|19px|middle|link=]] Wandering Shroom |
✔ | ✔ | ✔ | ✔ | ✔ | ✔ | ✔ |
| [[File:Icon Element Error: Table Quests not found. .png|19px|middle|link=]] Blazing Ghost |
✔ | ✘ | ✘ | ✘ | ✔ | ✘ | ✔ |
| [[File:Icon Element Error: Table Quests not found. .png|19px|middle|link=]] Frost Hermit |
✘ | ✘ | ✔ | ✘ | ✘ | ✔ | ✔ |
| [[File:Icon Element Error: Table Quests not found. .png|19px|middle|link=]] Steel Golem |
✔ | ✘ | ✔ | ✘ | ✔ | ✘ | ✔ |
| [[File:Icon Element Error: Table Quests not found. .png|19px|middle|link=]] Obsidian Golem |
✘ | ✔ | ✘ | ✔ | ✘ | ✔ | ✘ |
| [[File:Icon Element Error: Table Quests not found. .png|19px|middle|link=]] Void Zephyr |
✘ | ✘ | ✘ | ✔ | ✘ | ✔ | ✔ |
| [[File:Icon Element Error: Table Quests not found. .png|19px|middle|link=]] Raging Manticore |
✘ | ✔ | ✘ | ✘ | ✘ | ✔ | ✘ |
Day Boss
|
Mon | Tue | Wed | Thur | Fri | Sat | Sun |
|---|---|---|---|---|---|---|---|
| [[File:Icon Element Error: Table Quests not found. .png|19px|middle|link=]] Wandering Shroom |
✔ | ✔ | ✔ | ✔ | ✔ | ✔ | ✔ |
| [[File:Icon Element Error: Table Quests not found. .png|19px|middle|link=]] Blazing Ghost |
X | ✔ | X | ✔ | X | X | ✔ |
| [[File:Icon Element Error: Table Quests not found. .png|19px|middle|link=]] Frost Hermit |
✔ | X | ✔ | X | ✔ | ✔ | ✔ |
| [[File:Icon Element Error: Table Quests not found. .png|19px|middle|link=]] Steel Golem |
✔ | X | X | ✔ | X | X | X |
| [[File:Icon Element Error: Table Quests not found. .png|19px|middle|link=]] Obsidian Golem |
X | ✔ | ✔ | X | ✔ | ✔ | ✔ |
| [[File:Icon Element Error: Table Quests not found. .png|19px|middle|link=]] Void Zephyr |
✔ | X | ✔ | X | X | ✔ | X |
| [[File:Icon Element Error: Table Quests not found. .png|19px|middle|link=]] Raging Manticore |
X | X | ✔ | X | X | X | X |
| [[File:Icon Element Error: Table Quests not found. .png|19px|middle|link=]] Void Agni |
X | ✔ | X | ✔ | ✔ | ✔ | ✔ |
Day Boss
|
Mon | Tue | Wed | Thur | Fri | Sat | Sun |
|---|---|---|---|---|---|---|---|
| [[File:Icon Element Error: Table Quests not found. .png|19px|middle|link=]] Wandering Shroom |
✔ | ✔ | ✔ | ✔ | ✔ | ✔ | ✔ |
| [[File:Icon Element Error: Table Quests not found. .png|19px|middle|link=]] Blazing Ghost |
✔ | X | X | ✔ | X | ✔ | X |
| [[File:Icon Element Error: Table Quests not found. .png|19px|middle|link=]] Frost Hermit |
X | ✔ | ✔ | X | ✔ | X | ✔ |
| [[File:Icon Element Error: Table Quests not found. .png|19px|middle|link=]] Steel Golem |
✔ | ✔ | X | X | ✔ | X | X |
| [[File:Icon Element Error: Table Quests not found. .png|19px|middle|link=]] Obsidian Golem |
X | X | ✔ | ✔ | X | ✔ | ✔ |
| [[File:Icon Element Error: Table Quests not found. .png|19px|middle|link=]] Void Zephyr |
✔ | X | ✔ | X | X | ✔ | X |
| [[File:Icon Element Error: Table Quests not found. .png|19px|middle|link=]] Raging Manticore |
X | X | X | ✔ | X | ✔ | ✔ |
| [[File:Icon Element Error: Table Quests not found. .png|19px|middle|link=]] Void Agni |
X | ✔ | X | X | ✔ | X | ✔ |
Day Boss
|
Mon | Tue | Wed | Thur | Fri | Sat | Sun |
|---|---|---|---|---|---|---|---|
| [[File:Icon Element Error: Table Quests not found. .png|19px|middle|link=]] Wandering Shroom |
✔ | ✔ | ✔ | ✔ | ✔ | ✔ | ✔ |
| [[File:Icon Element Error: Table Quests not found. .png|19px|middle|link=]] Blazing Ghost |
✔ | X | X | ✔ | X | ✔ | X |
| [[File:Icon Element Error: Table Quests not found. .png|19px|middle|link=]] Frost Hermit |
X | ✔ | ✔ | X | ✔ | X | ✔ |
| [[File:Icon Element Error: Table Quests not found. .png|19px|middle|link=]] Steel Golem |
✔ | ✔ | X | X | ✔ | X | X |
| [[File:Icon Element Error: Table Quests not found. .png|19px|middle|link=]] Obsidian Golem |
X | X | ✔ | ✔ | X | ✔ | ✔ |
| [[File:Icon Element Error: Table Quests not found. .png|19px|middle|link=]] Void Zephyr |
✔ | X | ✔ | X | X | ✔ | X |
| [[File:Icon Element Error: Table Quests not found. .png|19px|middle|link=]] Raging Manticore |
X | X | X | ✔ | X | ✔ | ✔ |
| [[File:Icon Element Error: Table Quests not found. .png|19px|middle|link=]] Void Agni |
X | ✔ | X | X | ✔ | X | X |
Day Boss
|
Mon | Tue | Wed | Thur | Fri | Sat | Sun |
|---|---|---|---|---|---|---|---|
| [[File:Icon Element Error: Table Quests not found. .png|19px|middle|link=]] Wandering Shroom |
✘ | ✘ | ✘ | ✔ | ✘ | ✔ | ✘ |
| [[File:Icon Element Error: Table Quests not found. .png|19px|middle|link=]] Gust Shroom |
✔ | ✔ | ✔ | ✘ | ✔ | ✘ | ✔ |
| [[File:Icon Element Error: Table Quests not found. .png|19px|middle|link=]] Blazing Ghost |
✔ | ✔ | ✘ | ✘ | ✔ | ✔ | ✘ |
| [[File:Icon Element Error: Table Quests not found. .png|19px|middle|link=]] Violet Ghost |
✔ | ✘ | ✔ | ✔ | ✘ | ✔ | ✔ |
| [[File:Icon Element Error: Table Quests not found. .png|19px|middle|link=]] Frost Hermit |
✘ | ✔ | ✘ | ✔ | ✘ | ✘ | ✘ |
| [[File:Icon Element Error: Table Quests not found. .png|19px|middle|link=]] Steel Golem |
✘ | ✘ | ✔ | ✘ | ✔ | ✘ | ✘ |
| [[File:Icon Element Error: Table Quests not found. .png|19px|middle|link=]] Obsidian Golem |
✔ | ✘ | ✘ | ✔ | ✘ | ✔ | ✘ |
| [[File:Icon Element Error: Table Quests not found. .png|19px|middle|link=]] Amber Golem |
✘ | ✔ | ✔ | ✘ | ✔ | ✔ | ✔ |
| [[File:Icon Element Error: Table Quests not found. .png|19px|middle|link=]] Void Zephyr |
✔ | ✘ | ✔ | ✘ | ✘ | ✔ | ✔ |
| [[File:Icon Element Error: Table Quests not found. .png|19px|middle|link=]] Raging Manticore |
✘ | ✘ | ✘ | ✘ | ✘ | ✘ | ✔ |
| [[File:Icon Element Error: Table Quests not found. .png|19px|middle|link=]] Void Agni |
✘ | ✔ | ✘ | ✔ | ✔ | ✘ | ✔ |
Day Boss
|
Mon | Tue | Wed | Thur | Fri | Sat | Sun |
|---|---|---|---|---|---|---|---|
| [[File:Icon Element Error: Table Quests not found. .png|19px|middle|link=]] Wandering Shroom |
✔ | ✘ | ✔ | ✘ | ✔ | ✘ | ✔ |
| [[File:Icon Element Error: Table Quests not found. .png|19px|middle|link=]] Gust Shroom |
✘ | ✔ | ✘ | ✔ | ✘ | ✔ | ✘ |
| [[File:Icon Element Error: Table Quests not found. .png|19px|middle|link=]] Blazing Ghost |
✘ | ✘ | ✘ | ✔ | ✘ | ✔ | ✘ |
| [[File:Icon Element Error: Table Quests not found. .png|19px|middle|link=]] Violet Ghost |
✘ | ✘ | ✔ | ✘ | ✔ | ✘ | ✔ |
| [[File:Icon Element Error: Table Quests not found. .png|19px|middle|link=]] Frost Hermit |
✔ | ✔ | ✘ | ✘ | ✘ | ✘ | ✔ |
| [[File:Icon Element Error: Table Quests not found. .png|19px|middle|link=]] Steel Golem |
✔ | ✘ | ✔ | ✘ | ✘ | ✘ | ✔ |
| [[File:Icon Element Error: Table Quests not found. .png|19px|middle|link=]] Obsidian Golem |
✘ | ✘ | ✘ | ✔ | ✔ | ✘ | ✘ |
| [[File:Icon Element Error: Table Quests not found. .png|19px|middle|link=]] Amber Golem |
✘ | ✔ | ✘ | ✘ | ✘ | ✔ | ✘ |
| [[File:Icon Element Error: Table Quests not found. .png|19px|middle|link=]] Void Zephyr |
✔ | ✘ | ✔ | ✘ | ✘ | ✘ | ✔ |
| [[File:Icon Element Error: Table Quests not found. .png|19px|middle|link=]] Raging Manticore |
✘ | ✘ | ✘ | ✔ | ✘ | ✔ | ✘ |
| [[File:Icon Element Error: Table Quests not found. .png|19px|middle|link=]] Void Agni |
✘ | ✔ | ✘ | ✘ | ✔ | ✔ | ✘ |
Day Boss
|
Mon | Tue | Wed | Thur | Fri | Sat | Sun |
|---|---|---|---|---|---|---|---|
| [[File:Icon Element Error: Table Quests not found. .png|19px|middle|link=]] Wandering Shroom |
✔ | ✘ | ✔ | ✘ | ✔ | ✘ | ✔ |
| [[File:Icon Element Error: Table Quests not found. .png|19px|middle|link=]] Gust Shroom |
✘ | ✔ | ✘ | ✔ | ✘ | ✔ | ✘ |
| [[File:Icon Element Error: Table Quests not found. .png|19px|middle|link=]] Blazing Ghost |
✘ | ✘ | ✘ | ✘ | ✘ | ✔ | ✘ |
| [[File:Icon Element Error: Table Quests not found. .png|19px|middle|link=]] Violet Ghost |
✔ | ✔ | ✔ | ✔ | ✔ | ✘ | ✔ |
| [[File:Icon Element Error: Table Quests not found. .png|19px|middle|link=]] Frost Hermit |
✔ | ✘ | ✔ | ✔ | ✔ | ✔ | ✔ |
| [[File:Icon Element Error: Table Quests not found. .png|19px|middle|link=]] Steel Golem |
✔ | ✘ | ✘ | ✘ | ✘ | ✘ | ✔ |
| [[File:Icon Element Error: Table Quests not found. .png|19px|middle|link=]] Obsidian Golem |
✘ | ✘ | ✘ | ✔ | ✘ | ✘ | ✘ |
| [[File:Icon Element Error: Table Quests not found. .png|19px|middle|link=]] Amber Golem |
✘ | ✔ | ✘ | ✘ | ✘ | ✔ | ✘ |
| [[File:Icon Element Error: Table Quests not found. .png|19px|middle|link=]] Void Zephyr |
✔ | ✘ | ✔ | ✘ | ✘ | ✘ | ✔ |
| [[File:Icon Element Error: Table Quests not found. .png|19px|middle|link=]] Void Poseidon |
✘ | ✔ | ✔ | ✔ | ✔ | ✔ | ✔ |
| [[File:Icon Element Error: Table Quests not found. .png|19px|middle|link=]] Raging Manticore |
✘ | ✘ | ✘ | ✔ | ✘ | ✘ | ✘ |
| [[File:Icon Element Error: Table Quests not found. .png|19px|middle|link=]] Void Agni |
✘ | ✔ | ✘ | ✘ | ✔ | ✔ | ✘ |
Day Boss
|
Mon | Tue | Wed | Thur | Fri | Sat | Sun |
|---|---|---|---|---|---|---|---|
| [[File:Icon Element Error: Table Quests not found. .png|19px|middle|link=]] Wandering Shroom |
✔ | ✘ | ✔ | ✘ | ✔ | ✘ | ✔ |
| [[File:Icon Element Error: Table Quests not found. .png|19px|middle|link=]] Gust Shroom |
✘ | ✔ | ✘ | ✔ | ✘ | ✔ | ✘ |
| [[File:Icon Element Error: Table Quests not found. .png|19px|middle|link=]] Blazing Ghost |
✔ | ✘ | ✘ | ✔ | ✘ | ✔ | ✘ |
| [[File:Icon Element Error: Table Quests not found. .png|19px|middle|link=]] Violet Ghost |
✘ | ✘ | ✔ | ✘ | ✔ | ✘ | ✔ |
| [[File:Icon Element Error: Table Quests not found. .png|19px|middle|link=]] Frost Hermit |
✔ | ✔ | ✘ | ✘ | ✘ | ✘ | ✔ |
| [[File:Icon Element Error: Table Quests not found. .png|19px|middle|link=]] Steel Golem |
✘ | ✘ | ✔ | ✘ | ✘ | ✘ | ✔ |
| [[File:Icon Element Error: Table Quests not found. .png|19px|middle|link=]] Obsidian Golem |
✘ | ✘ | ✘ | ✔ | ✔ | ✘ | ✘ |
| [[File:Icon Element Error: Table Quests not found. .png|19px|middle|link=]] Amber Golem |
✘ | ✔ | ✘ | ✘ | ✘ | ✔ | ✘ |
| [[File:Icon Element Error: Table Quests not found. .png|19px|middle|link=]] Void Zephyr |
✔ | ✘ | ✔ | ✘ | ✘ | ✘ | ✔ |
| [[File:Icon Element Error: Table Quests not found. .png|19px|middle|link=]] Void Poseidon |
✘ | ✘ | ✘ | ✔ | ✘ | ✘ | ✔ |
| [[File:Icon Element Error: Table Quests not found. .png|19px|middle|link=]] Raging Manticore |
✘ | ✘ | ✘ | ✔ | ✘ | ✔ | ✘ |
| [[File:Icon Element Error: Table Quests not found. .png|19px|middle|link=]] Void Agni |
✘ | ✔ | ✘ | ✘ | ✔ | ✔ | ✘ |
Day Boss
|
Mon | Tue | Wed | Thur | Fri | Sat | Sun |
|---|---|---|---|---|---|---|---|
| [[File:Icon Element Error: Table Quests not found. .png|19px|middle|link=]] Wandering Shroom |
✔ | ✘ | ✔ | ✘ | ✔ | ✘ | ✔ |
| [[File:Icon Element Error: Table Quests not found. .png|19px|middle|link=]] Gust Shroom |
✘ | ✔ | ✘ | ✔ | ✘ | ✔ | ✘ |
| [[File:Icon Element Error: Table Quests not found. .png|19px|middle|link=]] Blazing Ghost |
✘ | ✘ | ✘ | ✔ | ✘ | ✔ | ✘ |
| [[File:Icon Element Error: Table Quests not found. .png|19px|middle|link=]] Violet Ghost |
✘ | ✘ | ✔ | ✘ | ✔ | ✘ | ✔ |
| [[File:Icon Element Error: Table Quests not found. .png|19px|middle|link=]] Frost Hermit |
✔ | ✔ | ✔ | ✔ | ✔ | ✔ | ✔ |
| [[File:Icon Element Error: Table Quests not found. .png|19px|middle|link=]] Steel Golem |
✔ | ✘ | ✘ | ✘ | ✘ | ✘ | ✘ |
| [[File:Icon Element Error: Table Quests not found. .png|19px|middle|link=]] Obsidian Golem |
✘ | ✔ | ✔ | ✔ | ✔ | ✘ | ✔ |
| [[File:Icon Element Error: Table Quests not found. .png|19px|middle|link=]] Amber Golem |
✘ | ✘ | ✘ | ✘ | ✘ | ✔ | ✘ |
| [[File:Icon Element Error: Table Quests not found. .png|19px|middle|link=]] Raging Manticore |
✘ | ✘ | ✘ | ✘ | ✘ | ✔ | ✘ |
| [[File:Icon Element Error: Table Quests not found. .png|19px|middle|link=]] Greedy Manticore |
✔ | ✔ | ✔ | ✘ | ✔ | ✘ | ✔ |
| [[File:Icon Element Error: Table Quests not found. .png|19px|middle|link=]] Void Zephyr |
✔ | ✘ | ✘ | ✘ | ✘ | ✘ | ✔ |
| [[File:Icon Element Error: Table Quests not found. .png|19px|middle|link=]] Void Poseidon |
✔ | ✘ | ✘ | ✔ | ✘ | ✘ | ✘ |
| [[File:Icon Element Error: Table Quests not found. .png|19px|middle|link=]] Void Jeanne d'Arc |
✘ | ✔ | ✔ | ✔ | ✔ | ✔ | ✔ |
| [[File:Icon Element Error: Table Quests not found. .png|19px|middle|link=]] Void Agni |
✘ | ✔ | ✘ | ✘ | ✘ | ✔ | ✘ |
Day Boss
|
Mon | Tue | Wed | Thur | Fri | Sat | Sun |
|---|---|---|---|---|---|---|---|
| [[File:Icon Element Error: Table Quests not found. .png|19px|middle|link=]] Wandering Shroom |
✔ | ✘ | ✔ | ✘ | ✔ | ✘ | ✔ |
| [[File:Icon Element Error: Table Quests not found. .png|19px|middle|link=]] Gust Shroom |
✘ | ✔ | ✘ | ✔ | ✘ | ✔ | ✘ |
| [[File:Icon Element Error: Table Quests not found. .png|19px|middle|link=]] Blazing Ghost |
✘ | ✘ | ✘ | ✔ | ✘ | ✔ | ✘ |
| [[File:Icon Element Error: Table Quests not found. .png|19px|middle|link=]] Violet Ghost |
✘ | ✘ | ✔ | ✘ | ✔ | ✘ | ✘ |
| [[File:Icon Element Error: Table Quests not found. .png|19px|middle|link=]] Frost Hermit |
✔ | ✔ | ✘ | ✘ | ✘ | ✘ | ✔ |
| [[File:Icon Element Error: Table Quests not found. .png|19px|middle|link=]] Steel Golem |
✘ | ✘ | ✔ | ✘ | ✘ | ✘ | ✔ |
| [[File:Icon Element Error: Table Quests not found. .png|19px|middle|link=]] Obsidian Golem |
✔ | ✘ | ✘ | ✔ | ✔ | ✘ | ✘ |
| [[File:Icon Element Error: Table Quests not found. .png|19px|middle|link=]] Amber Golem |
✘ | ✘ | ✘ | ✘ | ✘ | ✔ | ✘ |
| [[File:Icon Element Error: Table Quests not found. .png|19px|middle|link=]] Raging Manticore |
✘ | ✘ | ✔ | ✘ | ✘ | ✘ | ✘ |
| [[File:Icon Element Error: Table Quests not found. .png|19px|middle|link=]] Greedy Manticore |
✘ | ✘ | ✘ | ✘ | ✘ | ✔ | ✘ |
| [[File:Icon Element Error: Table Quests not found. .png|19px|middle|link=]] Void Zephyr |
✘ | ✔ | ✘ | ✘ | ✘ | ✘ | ✔ |
| [[File:Icon Element Error: Table Quests not found. .png|19px|middle|link=]] Void Poseidon |
✘ | ✘ | ✔ | ✘ | ✘ | ✘ | ✔ |
| [[File:Icon Element Error: Table Quests not found. .png|19px|middle|link=]] Void Jeanne d'Arc |
✘ | ✔ | ✘ | ✔ | ✘ | ✔ | ✘ |
| [[File:Icon Element Error: Table Quests not found. .png|19px|middle|link=]] Void Agni |
✔ | ✘ | ✘ | ✘ | ✔ | ✘ | ✘ |
Day Boss
|
Mon | Tue | Wed | Thur | Fri | Sat | Sun |
|---|---|---|---|---|---|---|---|
| [[File:Icon Element Error: Table Quests not found. .png|19px|middle|link=]] Scalding Shroom |
✔ | ✘ | ✔ | ✔ | ✔ | ✔ | ✔ |
| [[File:Icon Element Error: Table Quests not found. .png|19px|middle|link=]] Gust Shroom |
✘ | ✔ | ✘ | ✘ | ✘ | ✔ | ✘ |
| [[File:Icon Element Error: Table Quests not found. .png|19px|middle|link=]] Wandering Shroom |
✘ | ✘ | ✘ | ✔ | ✘ | ✘ | ✘ |
| [[File:Icon Element Error: Table Quests not found. .png|19px|middle|link=]] Blazing Ghost |
✘ | ✔ | ✘ | ✘ | ✘ | ✔ | ✘ |
| [[File:Icon Element Error: Table Quests not found. .png|19px|middle|link=]] Violet Ghost |
✘ | ✘ | ✘ | ✘ | ✘ | ✘ | ✔ |
| [[File:Icon Element Error: Table Quests not found. .png|19px|middle|link=]] Frost Hermit |
✘ | ✘ | ✔ | ✔ | ✘ | ✘ | ✔ |
| [[File:Icon Element Error: Table Quests not found. .png|19px|middle|link=]] Twilight Hermit |
✔ | ✔ | ✘ | ✔ | ✔ | ✔ | ✔ |
| [[File:Icon Element Error: Table Quests not found. .png|19px|middle|link=]] Steel Golem |
✔ | ✘ | ✘ | ✘ | ✘ | ✘ | ✘ |
| [[File:Icon Element Error: Table Quests not found. .png|19px|middle|link=]] Amber Golem |
✘ | ✘ | ✘ | ✘ | ✔ | ✘ | ✘ |
| [[File:Icon Element Error: Table Quests not found. .png|19px|middle|link=]] Obsidian Golem |
✘ | ✘ | ✔ | ✘ | ✘ | ✘ | ✘ |
| [[File:Icon Element Error: Table Quests not found. .png|19px|middle|link=]] Greedy Manticore |
✘ | ✘ | ✘ | ✘ | ✔ | ✘ | ✔ |
| [[File:Icon Element Error: Table Quests not found. .png|19px|middle|link=]] Raging Manticore |
✘ | ✔ | ✘ | ✘ | ✘ | ✘ | ✘ |
| [[File:Icon Element Error: Table Quests not found. .png|19px|middle|link=]] Void Zephyr |
✘ | ✘ | ✔ | ✘ | ✘ | ✘ | ✔ |
| [[File:Icon Element Error: Table Quests not found. .png|19px|middle|link=]] Void Poseidon |
✔ | ✘ | ✘ | ✔ | ✘ | ✔ | ✘ |
| [[File:Icon Element Error: Table Quests not found. .png|19px|middle|link=]] Void Jeanne d'Arc |
✔ | ✔ | ✘ | ✔ | ✔ | ✔ | ✔ |
| [[File:Icon Element Error: Table Quests not found. .png|19px|middle|link=]] Void Agni |
✘ | ✘ | ✔ | ✘ | ✘ | ✔ | ✘ |
Day Boss
|
Mon | Tue | Wed | Thur | Fri | Sat | Sun |
|---|---|---|---|---|---|---|---|
| [[File:Icon Element Error: Table Quests not found. .png|19px|middle|link=]] Scalding Shroom |
✘ | ✔ | ✘ | ✔ | ✘ | ✔ | ✘ |
| [[File:Icon Element Error: Table Quests not found. .png|19px|middle|link=]] Gust Shroom |
✔ | ✘ | ✘ | ✘ | ✔ | ✘ | ✘ |
| [[File:Icon Element Error: Table Quests not found. .png|19px|middle|link=]] Wandering Shroom |
✘ | ✘ | ✔ | ✘ | ✘ | ✘ | ✔ |
| [[File:Icon Element Error: Table Quests not found. .png|19px|middle|link=]] Blazing Ghost |
✔ | ✘ | ✘ | ✘ | ✔ | ✘ | ✘ |
| [[File:Icon Element Error: Table Quests not found. .png|19px|middle|link=]] Violet Ghost |
✘ | ✘ | ✔ | ✘ | ✘ | ✘ | ✘ |
| [[File:Icon Element Error: Table Quests not found. .png|19px|middle|link=]] Frost Hermit |
✘ | ✘ | ✘ | ✔ | ✘ | ✘ | ✔ |
| [[File:Icon Element Error: Table Quests not found. .png|19px|middle|link=]] Twilight Hermit |
✘ | ✔ | ✘ | ✘ | ✘ | ✔ | ✘ |
| [[File:Icon Element Error: Table Quests not found. .png|19px|middle|link=]] Steel Golem |
✘ | ✔ | ✘ | ✘ | ✘ | ✘ | ✔ |
| [[File:Icon Element Error: Table Quests not found. .png|19px|middle|link=]] Amber Golem |
✘ | ✘ | ✔ | ✘ | ✘ | ✔ | ✘ |
| [[File:Icon Element Error: Table Quests not found. .png|19px|middle|link=]] Obsidian Golem |
✔ | ✘ | ✘ | ✘ | ✔ | ✘ | ✘ |
| [[File:Icon Element Error: Table Quests not found. .png|19px|middle|link=]] Greedy Manticore |
✔ | ✘ | ✘ | ✔ | ✘ | ✘ | ✘ |
| [[File:Icon Element Error: Table Quests not found. .png|19px|middle|link=]] Raging Manticore |
✘ | ✘ | ✔ | ✘ | ✘ | ✔ | ✘ |
| [[File:Icon Element Error: Table Quests not found. .png|19px|middle|link=]] Void Zephyr |
✘ | ✘ | ✔ | ✘ | ✘ | ✘ | ✔ |
| [[File:Icon Element Error: Table Quests not found. .png|19px|middle|link=]] Void Poseidon |
✘ | ✔ | ✘ | ✘ | ✘ | ✔ | ✘ |
| [[File:Icon Element Error: Table Quests not found. .png|19px|middle|link=]] Void Jeanne d'Arc |
✘ | ✘ | ✘ | ✔ | ✘ | ✘ | ✔ |
| [[File:Icon Element Error: Table Quests not found. .png|19px|middle|link=]] Void Agni |
✔ | ✘ | ✘ | ✘ | ✔ | ✘ | ✘ |
Day Boss
|
Mon | Tue | Wed | Thur | Fri | Sat | Sun |
|---|---|---|---|---|---|---|---|
| [[File:Icon Element Error: Table Quests not found. .png|19px|middle|link=]] Scalding Shroom |
✘ | ✘ | ✔ | ✔ | ✔ | ✘ | ✔ |
| [[File:Icon Element Error: Table Quests not found. .png|19px|middle|link=]] Gust Shroom |
✘ | ✔ | ✘ | ✘ | ✘ | ✘ | ✘ |
| [[File:Icon Element Error: Table Quests not found. .png|19px|middle|link=]] Wandering Shroom |
✘ | ✘ | ✘ | ✘ | ✘ | ✔ | ✘ |
| [[File:Icon Element Error: Table Quests not found. .png|19px|middle|link=]] Blazing Ghost |
✔ | ✘ | ✘ | ✘ | ✘ | ✘ | ✘ |
| [[File:Icon Element Error: Table Quests not found. .png|19px|middle|link=]] Violet Ghost |
✘ | ✘ | ✘ | ✘ | ✔ | ✘ | ✘ |
| [[File:Icon Element Error: Table Quests not found. .png|19px|middle|link=]] Frost Hermit |
✘ | ✘ | ✘ | ✘ | ✔ | ✘ | ✔ |
| [[File:Icon Element Error: Table Quests not found. .png|19px|middle|link=]] Twilight Hermit |
✔ | ✔ | ✔ | ✔ | ✘ | ✔ | ✘ |
| [[File:Icon Element Error: Table Quests not found. .png|19px|middle|link=]] Steel Golem |
✘ | ✘ | ✘ | ✘ | ✘ | ✔ | ✘ |
| [[File:Icon Element Error: Table Quests not found. .png|19px|middle|link=]] Amber Golem |
✘ | ✘ | ✘ | ✘ | ✘ | ✘ | ✔ |
| [[File:Icon Element Error: Table Quests not found. .png|19px|middle|link=]] Obsidian Golem |
✘ | ✔ | ✔ | ✔ | ✔ | ✘ | ✘ |
| [[File:Icon Element Error: Table Quests not found. .png|19px|middle|link=]] Catoblepas Anemos |
✔ | ✘ | ✔ | ✔ | ✔ | ✔ | ✔ |
| [[File:Icon Element Error: Table Quests not found. .png|19px|middle|link=]] Greedy Manticore |
✘ | ✔ | ✘ | ✘ | ✘ | ✘ | ✘ |
| [[File:Icon Element Error: Table Quests not found. .png|19px|middle|link=]] Raging Manticore |
✔ | ✘ | ✔ | ✔ | ✘ | ✔ | ✔ |
| [[File:Icon Element Error: Table Quests not found. .png|19px|middle|link=]] Void Zephyr |
✘ | ✘ | ✘ | ✘ | ✘ | ✘ | ✔ |
| [[File:Icon Element Error: Table Quests not found. .png|19px|middle|link=]] Void Poseidon |
✘ | ✘ | ✘ | ✘ | ✘ | ✔ | ✘ |
| [[File:Icon Element Error: Table Quests not found. .png|19px|middle|link=]] Void Jeanne d'Arc |
✔ | ✘ | ✘ | ✘ | ✘ | ✘ | ✘ |
| [[File:Icon Element Error: Table Quests not found. .png|19px|middle|link=]] Void Nidhogg |
✔ | ✔ | ✔ | ✔ | ✔ | ✔ | ✔ |
| [[File:Icon Element Error: Table Quests not found. .png|19px|middle|link=]] Void Agni |
✘ | ✔ | ✘ | ✘ | ✘ | ✘ | ✘ |
Day Boss
|
Mon | Tue | Wed | Thur | Fri | Sat | Sun |
|---|---|---|---|---|---|---|---|
| [[File:Icon Element Error: Table Quests not found. .png|19px|middle|link=]] Scalding Shroom |
✘ | ✘ | ✘ | ✘ | ✘ | ✔ | ✘ |
| [[File:Icon Element Error: Table Quests not found. .png|19px|middle|link=]] Gust Shroom |
✘ | ✘ | ✘ | ✘ | ✘ | ✘ | ✔ |
| [[File:Icon Element Error: Table Quests not found. .png|19px|middle|link=]] Wandering Shroom |
✔ | ✘ | ✔ | ✘ | ✘ | ✘ | ✘ |
| [[File:Icon Element Error: Table Quests not found. .png|19px|middle|link=]] Blazing Ghost |
✔ | ✘ | ✘ | ✔ | ✘ | ✘ | ✘ |
| [[File:Icon Element Error: Table Quests not found. .png|19px|middle|link=]] Violet Ghost |
✘ | ✘ | ✘ | ✘ | ✘ | ✘ | ✔ |
| [[File:Icon Element Error: Table Quests not found. .png|19px|middle|link=]] Frost Hermit |
✘ | ✔ | ✔ | ✘ | ✘ | ✘ | ✘ |
| [[File:Icon Element Error: Table Quests not found. .png|19px|middle|link=]] Twilight Hermit |
✘ | ✘ | ✘ | ✔ | ✔ | ✘ | ✘ |
| [[File:Icon Element Error: Table Quests not found. .png|19px|middle|link=]] Steel Golem |
✔ | ✘ | ✘ | ✘ | ✔ | ✘ | ✘ |
| [[File:Icon Element Error: Table Quests not found. .png|19px|middle|link=]] Amber Golem |
✘ | ✘ | ✘ | ✘ | ✘ | ✔ | ✘ |
| [[File:Icon Element Error: Table Quests not found. .png|19px|middle|link=]] Obsidian Golem |
✘ | ✔ | ✘ | ✘ | ✘ | ✘ | ✔ |
| [[File:Icon Element Error: Table Quests not found. .png|19px|middle|link=]] Catoblepas Anemos |
✘ | ✘ | ✔ | ✘ | ✘ | ✔ | ✘ |
| [[File:Icon Element Error: Table Quests not found. .png|19px|middle|link=]] Greedy Manticore |
✘ | ✘ | ✘ | ✘ | ✘ | ✘ | ✔ |
| [[File:Icon Element Error: Table Quests not found. .png|19px|middle|link=]] Raging Manticore |
✘ | ✔ | ✘ | ✘ | ✔ | ✘ | ✘ |
| [[File:Icon Element Error: Table Quests not found. .png|19px|middle|link=]] Void Zephyr |
✔ | ✔ | ✘ | ✔ | ✔ | ✘ | ✔ |
| [[File:Icon Element Error: Table Quests not found. .png|19px|middle|link=]] Void Poseidon |
✔ | ✘ | ✔ | ✔ | ✔ | ✔ | ✘ |
| [[File:Icon Element Error: Table Quests not found. .png|19px|middle|link=]] Void Jeanne d'Arc |
✘ | ✔ | ✘ | ✔ | ✔ | ✔ | ✔ |
| [[File:Icon Element Error: Table Quests not found. .png|19px|middle|link=]] Void Nidhogg |
✔ | ✘ | ✔ | ✔ | ✘ | ✔ | ✔ |
| [[File:Icon Element Error: Table Quests not found. .png|19px|middle|link=]] Void Agni |
✘ | ✔ | ✔ | ✔ | ✘ | ✔ | ✔ |
Day Boss
|
Mon | Tue | Wed | Thur | Fri | Sat | Sun |
|---|---|---|---|---|---|---|---|
| [[File:Icon Element Error: Table Quests not found. .png|19px|middle|link=]] Scalding Shroom |
✔ | ✘ | ✘ | ✔ | ✘ | ✔ | ✘ |
| [[File:Icon Element Error: Table Quests not found. .png|19px|middle|link=]] Gust Shroom |
✘ | ✘ | ✔ | ✘ | ✘ | ✘ | ✔ |
| [[File:Icon Element Error: Table Quests not found. .png|19px|middle|link=]] Wandering Shroom |
✘ | ✔ | ✘ | ✘ | ✔ | ✘ | ✘ |
| [[File:Icon Element Error: Table Quests not found. .png|19px|middle|link=]] Blazing Ghost |
✘ | ✘ | ✘ | ✘ | ✘ | ✘ | ✔ |
| [[File:Icon Element Error: Table Quests not found. .png|19px|middle|link=]] Violet Ghost |
✘ | ✔ | ✘ | ✘ | ✘ | ✔ | ✘ |
| [[File:Icon Element Error: Table Quests not found. .png|19px|middle|link=]] Frost Hermit |
✔ | ✘ | ✘ | ✔ | ✘ | ✘ | ✘ |
| [[File:Icon Element Error: Table Quests not found. .png|19px|middle|link=]] Twilight Hermit |
✘ | ✘ | ✔ | ✘ | ✘ | ✔ | ✘ |
| [[File:Icon Element Error: Table Quests not found. .png|19px|middle|link=]] Steel Golem |
✘ | ✘ | ✔ | ✘ | ✘ | ✘ | ✘ |
| [[File:Icon Element Error: Table Quests not found. .png|19px|middle|link=]] Amber Golem |
✘ | ✘ | ✘ | ✔ | ✘ | ✘ | ✔ |
| [[File:Icon Element Error: Table Quests not found. .png|19px|middle|link=]] Obsidian Golem |
✘ | ✘ | ✘ | ✘ | ✔ | ✘ | ✘ |
| [[File:Icon Element Error: Table Quests not found. .png|19px|middle|link=]] Catoblepas Anemos |
✔ | ✘ | ✘ | ✘ | ✔ | ✘ | ✔ |
| [[File:Icon Element Error: Table Quests not found. .png|19px|middle|link=]] Greedy Manticore |
✘ | ✔ | ✘ | ✘ | ✘ | ✔ | ✘ |
| [[File:Icon Element Error: Table Quests not found. .png|19px|middle|link=]] Raging Manticore |
✘ | ✘ | ✘ | ✘ | ✘ | ✘ | ✔ |
| [[File:Icon Element Error: Table Quests not found. .png|19px|middle|link=]] Void Zephyr |
✘ | ✔ | ✘ | ✔ | ✘ | ✔ | ✘ |
| [[File:Icon Element Error: Table Quests not found. .png|19px|middle|link=]] Void Poseidon |
✘ | ✘ | ✔ | ✘ | ✔ | ✘ | ✔ |
| [[File:Icon Element Error: Table Quests not found. .png|19px|middle|link=]] Void Jeanne d'Arc |
✔ | ✘ | ✔ | ✘ | ✘ | ✔ | ✘ |
| [[File:Icon Element Error: Table Quests not found. .png|19px|middle|link=]] Void Nidhogg |
✔ | ✘ | ✘ | ✔ | ✘ | ✔ | ✘ |
| [[File:Icon Element Error: Table Quests not found. .png|19px|middle|link=]] Void Agni |
✘ | ✔ | ✘ | ✘ | ✔ | ✘ | ✔ |
Day Boss
|
Mon | Tue | Wed | Thur | Fri | Sat | Sun |
|---|---|---|---|---|---|---|---|
| [[File:Icon Element Error: Table Quests not found. .png|19px|middle|link=]] Scalding Shroom |
✘ | ✘ | ✘ | ✘ | ✘ | ✔ | ✘ |
| [[File:Icon Element Error: Table Quests not found. .png|19px|middle|link=]] Gust Shroom |
✔ | ✘ | ✘ | ✘ | ✘ | ✘ | ✘ |
| [[File:Icon Element Error: Table Quests not found. .png|19px|middle|link=]] Wandering Shroom |
✘ | ✘ | ✘ | ✔ | ✘ | ✘ | ✔ |
| [[File:Icon Element Error: Table Quests not found. .png|19px|middle|link=]] Blazing Ghost |
✘ | ✘ | ✔ | ✘ | ✘ | ✘ | ✘ |
| [[File:Icon Element Error: Table Quests not found. .png|19px|middle|link=]] Violet Ghost |
✔ | ✘ | ✘ | ✘ | ✘ | ✔ | ✘ |
| [[File:Icon Element Error: Table Quests not found. .png|19px|middle|link=]] Lambent Ghost |
✔ | ✔ | ✘ | ✔ | ✔ | ✔ | ✔ |
| [[File:Icon Element Error: Table Quests not found. .png|19px|middle|link=]] Frost Hermit |
✔ | ✔ | ✘ | ✔ | ✔ | ✔ | ✘ |
| [[File:Icon Element Error: Table Quests not found. .png|19px|middle|link=]] Twilight Hermit |
✘ | ✘ | ✔ | ✘ | ✘ | ✘ | ✘ |
| [[File:Icon Element Error: Table Quests not found. .png|19px|middle|link=]] Steel Golem |
✘ | ✔ | ✔ | ✘ | ✘ | ✔ | ✔ |
| [[File:Icon Element Error: Table Quests not found. .png|19px|middle|link=]] Amber Golem |
✘ | ✔ | ✘ | ✘ | ✘ | ✘ | ✘ |
| [[File:Icon Element Error: Table Quests not found. .png|19px|middle|link=]] Obsidian Golem |
✔ | ✘ | ✔ | ✔ | ✔ | ✘ | ✘ |
| [[File:Icon Element Error: Table Quests not found. .png|19px|middle|link=]] Catoblepas Anemos |
✘ | ✔ | ✔ | ✘ | ✔ | ✘ | ✔ |
| [[File:Icon Element Error: Table Quests not found. .png|19px|middle|link=]] Greedy Manticore |
✘ | ✘ | ✘ | ✘ | ✘ | ✘ | ✔ |
| [[File:Icon Element Error: Table Quests not found. .png|19px|middle|link=]] Raging Manticore |
✘ | ✘ | ✘ | ✘ | ✔ | ✘ | ✘ |
| [[File:Icon Element Error: Table Quests not found. .png|19px|middle|link=]] Void Zephyr |
✔ | ✔ | ✘ | ✔ | ✘ | ✔ | ✔ |
| [[File:Icon Element Error: Table Quests not found. .png|19px|middle|link=]] Void Poseidon |
✔ | ✘ | ✔ | ✔ | ✔ | ✔ | ✘ |
| [[File:Icon Element Error: Table Quests not found. .png|19px|middle|link=]] Void Jeanne d'Arc |
✘ | ✔ | ✘ | ✔ | ✔ | ✔ | ✔ |
| [[File:Icon Element Error: Table Quests not found. .png|19px|middle|link=]] Void Nidhogg |
✘ | ✔ | ✔ | ✔ | ✘ | ✔ | ✔ |
| [[File:Icon Element Error: Table Quests not found. .png|19px|middle|link=]] Void Agni |
✔ | ✘ | ✔ | ✔ | ✔ | ✘ | ✔ |
Day Quest
|
Mon | Tue | Wed | Thur | Fri | Sat | Sun |
|---|---|---|---|---|---|---|---|
| [[File:Icon Element Error: Table Quests not found. .png|19px|middle|link=]] Scalding Shroom Strike |
✘ | ✘ | ✔ | ✘ | ✘ | ✔ | ✘ |
| [[File:Icon Element Error: Table Quests not found. .png|19px|middle|link=]] Gust Shroom Strike |
✔ | ✘ | ✘ | ✘ | ✔ | ✘ | ✘ |
| [[File:Icon Element Error: Table Quests not found. .png|19px|middle|link=]] Wandering Shroom Strike |
✘ | ✘ | ✘ | ✔ | ✘ | ✘ | ✔ |
| [[File:Icon Element Error: Table Quests not found. .png|19px|middle|link=]] Blazing Ghost Strike |
✘ | ✘ | ✘ | ✔ | ✘ | ✘ | ✘ |
| [[File:Icon Element Error: Table Quests not found. .png|19px|middle|link=]] Violet Ghost Strike |
✘ | ✔ | ✘ | ✘ | ✘ | ✘ | ✘ |
| [[File:Icon Element Error: Table Quests not found. .png|19px|middle|link=]] Lambent Ghost Strike |
✘ | ✘ | ✘ | ✘ | ✔ | ✘ | ✘ |
| [[File:Icon Element Error: Table Quests not found. .png|19px|middle|link=]] Frost Hermit Strike |
✔ | ✘ | ✘ | ✘ | ✘ | ✔ | ✘ |
| [[File:Icon Element Error: Table Quests not found. .png|19px|middle|link=]] Twilight Hermit Strike |
✘ | ✘ | ✔ | ✘ | ✘ | ✘ | ✔ |
| [[File:Icon Element Error: Table Quests not found. .png|19px|middle|link=]] Steel Golem Strike |
✔ | ✘ | ✘ | ✘ | ✘ | ✘ | ✘ |
| [[File:Icon Element Error: Table Quests not found. .png|19px|middle|link=]] Amber Golem Strike |
✘ | ✔ | ✘ | ✘ | ✘ | ✘ | ✘ |
| [[File:Icon Element Error: Table Quests not found. .png|19px|middle|link=]] Obsidian Golem Strike |
✘ | ✘ | ✘ | ✘ | ✔ | ✘ | ✘ |
| [[File:Icon Element Error: Table Quests not found. .png|19px|middle|link=]] Catoblepas Anemos Strike |
✘ | ✘ | ✔ | ✘ | ✘ | ✘ | ✔ |
| [[File:Icon Element Error: Table Quests not found. .png|19px|middle|link=]] Greedy Manticore Strike |
✘ | ✘ | ✘ | ✔ | ✘ | ✔ | ✘ |
| [[File:Icon Element Error: Table Quests not found. .png|19px|middle|link=]] Raging Manticore Strike |
✘ | ✔ | ✘ | ✘ | ✘ | ✘ | ✔ |
| [[File:Icon Element Error: Table Quests not found. .png|19px|middle|link=]] Void Zephyr Strike |
✘ | ✔ | ✘ | ✔ | ✘ | ✔ | ✘ |
| [[File:Icon Element Error: Table Quests not found. .png|19px|middle|link=]] Void Poseidon Strike |
✘ | ✘ | ✔ | ✘ | ✔ | ✘ | ✔ |
| [[File:Icon Element Error: Table Quests not found. .png|19px|middle|link=]] Void Jeanne d'Arc Strike |
✔ | ✘ | ✔ | ✘ | ✘ | ✔ | ✘ |
| [[File:Icon Element Error: Table Quests not found. .png|19px|middle|link=]] Void Nidhogg Strike |
✔ | ✘ | ✘ | ✔ | ✘ | ✔ | ✘ |
| [[File:Icon Element Error: Table Quests not found. .png|19px|middle|link=]] Void Agni Strike |
✘ | ✔ | ✘ | ✘ | ✔ | ✘ | ✔ |
Day Quest
|
Mon | Tue | Wed | Thur | Fri | Sat | Sun |
|---|---|---|---|---|---|---|---|
| [[File:Icon Element Error: Table Quests not found. .png|19px|middle|link=]] Scalding Shroom Strike |
✘ | ✘ | ✘ | ✘ | ✘ | ✔ | ✘ |
| [[File:Icon Element Error: Table Quests not found. .png|19px|middle|link=]] Gust Shroom Strike |
✔ | ✘ | ✘ | ✔ | ✘ | ✘ | ✘ |
| [[File:Icon Element Error: Table Quests not found. .png|19px|middle|link=]] Wandering Shroom Strike |
✘ | ✔ | x2 | ✘ | ✔ | ✘ | x2 |
| [[File:Icon Element Error: Table Quests not found. .png|19px|middle|link=]] Blazing Ghost Strike |
✘ | ✘ | ✘ | ✘ | ✘ | ✘ | ✔ |
| [[File:Icon Element Error: Table Quests not found. .png|19px|middle|link=]] Lambent Ghost Strike |
✘ | ✔ | ✘ | ✘ | ✘ | ✘ | ✘ |
| [[File:Icon Element Error: Table Quests not found. .png|19px|middle|link=]] Violet Ghost Strike |
✘ | ✘ | ✘ | ✘ | ✘ | ✔ | ✘ |
| [[File:Icon Element Error: Table Quests not found. .png|19px|middle|link=]] Frost Hermit Strike |
x2 | ✘ | ✔ | x2 | ✘ | x2 | ✔ |
| [[File:Icon Element Error: Table Quests not found. .png|19px|middle|link=]] Twilight Hermit Strike |
✘ | ✔ | ✘ | ✘ | ✘ | ✘ | ✘ |
| [[File:Icon Element Error: Table Quests not found. .png|19px|middle|link=]] Steel Golem Strike |
✘ | ✘ | ✘ | ✘ | ✔ | ✘ | ✘ |
| [[File:Icon Element Error: Table Quests not found. .png|19px|middle|link=]] Amber Golem Strike |
✘ | ✘ | ✘ | ✘ | ✘ | ✘ | ✔ |
| [[File:Icon Element Error: Table Quests not found. .png|19px|middle|link=]] Obsidian Golem Strike |
✘ | ✘ | ✔ | ✘ | ✘ | ✘ | ✘ |
| [[File:Icon Element Error: Table Quests not found. .png|19px|middle|link=]] Catoblepas Anemos Strike |
✔ | x2 | ✘ | x2 | x2 | ✔ | ✘ |
| [[File:Icon Element Error: Table Quests not found. .png|19px|middle|link=]] Eolian Phantom Strike |
x2 | ✘ | x2 | x2 | ✔ | x2 | ✔ |
| [[File:Icon Element Error: Table Quests not found. .png|19px|middle|link=]] Smoldering Manticore Strike |
✘ | x2 | ✔ | x2 | x2 | ✔ | x2 |
| [[File:Icon Element Error: Table Quests not found. .png|19px|middle|link=]] Greedy Manticore Strike |
✘ | ✘ | ✘ | ✘ | ✘ | ✘ | ✔ |
| [[File:Icon Element Error: Table Quests not found. .png|19px|middle|link=]] Raging Manticore Strike |
✔ | ✘ | ✘ | ✘ | ✘ | ✘ | ✘ |
| [[File:Icon Element Error: Table Quests not found. .png|19px|middle|link=]] Void Zephyr Strike |
✘ | ✔ | ✔ | ✘ | x2 | ✔ | ✔ |
| [[File:Icon Element Error: Table Quests not found. .png|19px|middle|link=]] Void Poseidon Strike |
✔ | ✔ | x2 | ✘ | ✔ | x2 | ✘ |
| [[File:Icon Element Error: Table Quests not found. .png|19px|middle|link=]] Void Jeanne d'Arc Strike |
✘ | x2 | ✘ | ✔ | ✘ | ✔ | x2 |
| [[File:Icon Element Error: Table Quests not found. .png|19px|middle|link=]] Void Nidhogg Strike |
✔ | ✘ | ✘ | x2 | ✔ | ✘ | ✔ |
| [[File:Icon Element Error: Table Quests not found. .png|19px|middle|link=]] Void Agni Strike |
x2 | ✘ | ✔ | ✔ | ✘ | x2 | ✘ |
Day Quest
|
Mon | Tue | Wed | Thu | Fri | Sat | Sun |
|---|---|---|---|---|---|---|---|
| [[File:Icon Element Error: Table Quests not found. .png|19px|middle|link=]] Scalding Shroom Strike |
x2 | ✘ | ✘ | ✔ | ✘ | ✘ | ✘ |
| [[File:Icon Element Error: Table Quests not found. .png|19px|middle|link=]] Gust Shroom Strike |
✘ | ✘ | ✘ | ✘ | ✔ | ✘ | x2 |
| [[File:Icon Element Error: Table Quests not found. .png|19px|middle|link=]] Wandering Shroom Strike |
✘ | x2 | ✘ | ✘ | ✘ | ✔ | ✘ |
| [[File:Icon Element Error: Table Quests not found. .png|19px|middle|link=]] Blazing Ghost Strike |
✘ | ✘ | x2 | ✘ | ✘ | ✘ | ✘ |
| [[File:Icon Element Error: Table Quests not found. .png|19px|middle|link=]] Lambent Ghost Strike |
x2 | ✘ | ✘ | ✘ | ✘ | ✘ | ✘ |
| [[File:Icon Element Error: Table Quests not found. .png|19px|middle|link=]] Violet Ghost Strike |
✘ | ✘ | ✘ | ✘ | x2 | ✘ | ✘ |
| [[File:Icon Element Error: Table Quests not found. .png|19px|middle|link=]] Frost Hermit Strike |
✘ | ✔ | ✘ | x2 | ✘ | ✘ | ✘ |
| [[File:Icon Element Error: Table Quests not found. .png|19px|middle|link=]] Twilight Hermit Strike |
✘ | ✘ | ✘ | ✘ | ✘ | ✘ | x2 |
| [[File:Icon Element Error: Table Quests not found. .png|19px|middle|link=]] Steel Golem Strike |
✘ | ✘ | ✘ | ✘ | ✘ | x2 | ✘ |
| [[File:Icon Element Error: Table Quests not found. .png|19px|middle|link=]] Amber Golem Strike |
✘ | ✘ | ✘ | x2 | ✘ | ✘ | ✘ |
| [[File:Icon Element Error: Table Quests not found. .png|19px|middle|link=]] Obsidian Golem Strike |
✘ | x2 | ✘ | ✘ | ✘ | ✘ | ✘ |
| [[File:Icon Element Error: Table Quests not found. .png|19px|middle|link=]] Catoblepas Anemos Strike |
✘ | ✘ | ✔ | ✘ | x2 | ✘ | ✘ |
| [[File:Icon Element Error: Table Quests not found. .png|19px|middle|link=]] Eolian Phantom Strike |
x2 | ✘ | ✘ | ✘ | ✘ | ✔ | ✘ |
| [[File:Icon Element Error: Table Quests not found. .png|19px|middle|link=]] Smoldering Manticore Strike |
✘ | ✘ | ✘ | ✘ | ✘ | x2 | ✘ |
| [[File:Icon Element Error: Table Quests not found. .png|19px|middle|link=]] Greedy Manticore Strike |
✘ | ✘ | ✘ | ✘ | ✘ | ✘ | x2 |
| [[File:Icon Element Error: Table Quests not found. .png|19px|middle|link=]] Raging Manticore Strike |
✘ | ✘ | x2 | ✘ | ✘ | ✘ | ✘ |
| [[File:Icon Element Error: Table Quests not found. .png|19px|middle|link=]] Void Zephyr Strike |
✘ | ✔ | ✘ | x2 | ✘ | ✘ | ✔ |
| [[File:Icon Element Error: Table Quests not found. .png|19px|middle|link=]] Void Poseidon Strike |
✔ | ✘ | x2 | ✘ | ✘ | ✔ | ✘ |
| [[File:Icon Element Error: Table Quests not found. .png|19px|middle|link=]] Void Jeanne d'Arc Strike |
✘ | ✘ | ✔ | ✘ | x2 | ✘ | ✔ |
| [[File:Icon Element Error: Table Quests not found. .png|19px|middle|link=]] Void Nidhogg Strike |
✔ | ✘ | ✘ | ✔ | ✘ | x2 | ✔ |
| [[File:Icon Element Error: Table Quests not found. .png|19px|middle|link=]] Void Agni Strike |
✘ | x2 | ✘ | ✘ | ✔ | ✘ | ✘ |
Day Quest
|
Mon | Tue | Wed | Thu | Fri | Sat | Sun |
|---|---|---|---|---|---|---|---|
| [[File:Icon Element Error: Table Quests not found. .png|19px|middle|link=]] Scalding Shroom Strike |
✘ | x2 | ✘ | ✘ | ✘ | ✘ | ✘ |
| [[File:Icon Element Error: Table Quests not found. .png|19px|middle|link=]] Gust Shroom Strike |
✘ | ✘ | ✘ | x2 | ✘ | ✘ | ✘ |
| [[File:Icon Element Error: Table Quests not found. .png|19px|middle|link=]] Wandering Shroom Strike |
✔ | ✘ | x2 | ✘ | x2 | ✔ | x2 |
| [[File:Icon Element Error: Table Quests not found. .png|19px|middle|link=]] Blazing Ghost Strike |
✘ | ✘ | ✘ | ✘ | ✔ | ✘ | ✘ |
| [[File:Icon Element Error: Table Quests not found. .png|19px|middle|link=]] Lambent Ghost Strike |
✘ | ✔ | ✘ | ✘ | ✘ | ✘ | ✘ |
| [[File:Icon Element Error: Table Quests not found. .png|19px|middle|link=]] Violet Ghost Strike |
✘ | ✘ | ✔ | ✘ | ✘ | ✘ | ✘ |
| [[File:Icon Element Error: Table Quests not found. .png|19px|middle|link=]] Frost Hermit Strike |
x2 | ✔ | ✔ | ✘ | ✘ | x2 | ✘ |
| [[File:Icon Element Error: Table Quests not found. .png|19px|middle|link=]] Twilight Hermit Strike |
✔ | ✘ | ✘ | ✔ | ✘ | ✘ | ✔ |
| [[File:Icon Element Error: Table Quests not found. .png|19px|middle|link=]] Steel Golem Strike |
✘ | ✘ | ✘ | ✘ | ✘ | ✔ | ✘ |
| [[File:Icon Element Error: Table Quests not found. .png|19px|middle|link=]] Amber Golem Strike |
✘ | ✔ | ✘ | ✔ | ✘ | ✘ | ✘ |
| [[File:Icon Element Error: Table Quests not found. .png|19px|middle|link=]] Obsidian Golem Strike |
✘ | ✘ | ✔ | ✘ | ✔ | ✘ | ✘ |
| [[File:Icon Element Error: Table Quests not found. .png|19px|middle|link=]] Catoblepas Anemos Strike |
✔ | ✔ | ✘ | x2 | ✘ | ✘ | ✘ |
| [[File:Icon Element Error: Table Quests not found. .png|19px|middle|link=]] Eolian Phantom Strike |
x2 | ✘ | x2 | ✘ | x2 | ✔ | ✔ |
| [[File:Icon Element Error: Table Quests not found. .png|19px|middle|link=]] Smoldering Manticore Strike |
x2 | ✘ | ✔ | x2 | ✘ | ✘ | x2 |
| [[File:Icon Element Error: Table Quests not found. .png|19px|middle|link=]] Greedy Manticore Strike |
✔ | x2 | ✘ | ✔ | x2 | ✔ | ✘ |
| [[File:Icon Element Error: Table Quests not found. .png|19px|middle|link=]] Raging Manticore Strike |
✘ | ✔ | x2 | ✔ | ✔ | x2 | ✔ |
| [[File:Icon Element Error: Table Quests not found. .png|19px|middle|link=]] Void Zephyr Strike |
✔ | ✘ | x2 | ✘ | ✘ | x2 | ✘ |
| [[File:Icon Element Error: Table Quests not found. .png|19px|middle|link=]] Void Poseidon Strike |
x2 | ✘ | ✘ | x2 | ✘ | ✘ | ✔ |
| [[File:Icon Element Error: Table Quests not found. .png|19px|middle|link=]] Void Jeanne d'Arc Strike |
✘ | ✘ | ✔ | ✘ | x2 | ✘ | x2 |
| [[File:Icon Element Error: Table Quests not found. .png|19px|middle|link=]] Void Nidhogg Strike |
✘ | x2 | ✘ | ✘ | ✔ | ✘ | x2 |
| [[File:Icon Element Error: Table Quests not found. .png|19px|middle|link=]] Void Agni Strike |
✘ | x2 | ✘ | ✔ | ✘ | x2 | ✘ |
Day Quest
|
Mon | Tue | Wed | Thu | Fri | Sat | Sun |
|---|---|---|---|---|---|---|---|
| [[File:Icon Element Error: Table Quests not found. .png|19px|middle|link=]] Scalding Shroom Strike |
✘ | ✘ | ✘ | ✘ | ✘ | ✘ | ✔ |
| [[File:Icon Element Error: Table Quests not found. .png|19px|middle|link=]] Gust Shroom Strike |
✘ | ✘ | ✘ | ✘ | ✔ | ✘ | ✘ |
| [[File:Icon Element Error: Table Quests not found. .png|19px|middle|link=]] Wandering Shroom Strike |
✔ | ✘ | ✘ | ✘ | ✘ | ✔ | ✘ |
| [[File:Icon Element Error: Table Quests not found. .png|19px|middle|link=]] Blazing Ghost Strike |
✘ | ✘ | ✘ | x2 | ✘ | ✘ | ✘ |
| [[File:Icon Element Error: Table Quests not found. .png|19px|middle|link=]] Lambent Ghost Strike |
✘ | ✘ | ✘ | ✘ | x2 | ✘ | ✘ |
| [[File:Icon Element Error: Table Quests not found. .png|19px|middle|link=]] Violet Ghost Strike |
✘ | ✘ | ✘ | ✘ | ✘ | x2 | ✘ |
| [[File:Icon Element Error: Table Quests not found. .png|19px|middle|link=]] Frost Hermit Strike |
x2 | ✘ | ✘ | ✔ | ✘ | x2 | ✘ |
| [[File:Icon Element Error: Table Quests not found. .png|19px|middle|link=]] Twilight Hermit Strike |
✘ | ✘ | ✘ | ✘ | ✔ | ✘ | ✔ |
| [[File:Icon Element Error: Table Quests not found. .png|19px|middle|link=]] Steel Golem Strike |
✘ | ✘ | ✘ | ✘ | ✘ | ✘ | x2 |
| [[File:Icon Element Error: Table Quests not found. .png|19px|middle|link=]] Amber Golem Strike |
✘ | ✘ | ✘ | ✔ | ✘ | ✔ | ✘ |
| [[File:Icon Element Error: Table Quests not found. .png|19px|middle|link=]] Obsidian Golem Strike |
x2 | ✘ | ✘ | ✘ | x2 | ✘ | ✘ |
| [[File:Icon Element Error: Table Quests not found. .png|19px|middle|link=]] Catoblepas Anemos Strike |
✘ | ✘ | ✘ | x2 | ✘ | ✘ | ✔ |
| [[File:Icon Element Error: Table Quests not found. .png|19px|middle|link=]] Eolian Phantom Strike |
✔ | ✘ | ✘ | ✔ | x2 | ✔ | ✔ |
| [[File:Icon Element Error: Table Quests not found. .png|19px|middle|link=]] Smoldering Manticore Strike |
x2 | ✘ | ✘ | x2 | ✔ | ✔ | ✔ |
| [[File:Icon Element Error: Table Quests not found. .png|19px|middle|link=]] Greedy Manticore Strike |
✔ | ✘ | ✘ | ✘ | ✔ | ✘ | x2 |
| [[File:Icon Element Error: Table Quests not found. .png|19px|middle|link=]] Raging Manticore Strike |
✔ | ✘ | ✘ | ✔ | ✘ | x2 | ✘ |
| [[File:Icon Element Error: Table Quests not found. .png|19px|middle|link=]] Void Zephyr Strike |
✘ | ✘ | ✘ | ✘ | ✔ | ✘ | x2 |
| [[File:Icon Element Error: Table Quests not found. .png|19px|middle|link=]] Void Poseidon Strike |
✘ | ✘ | ✘ | ✔ | ✘ | x2 | ✘ |
| [[File:Icon Element Error: Table Quests not found. .png|19px|middle|link=]] Void Jeanne d'Arc Strike |
x2 | ✘ | ✘ | ✘ | ✘ | ✔ | ✘ |
| [[File:Icon Element Error: Table Quests not found. .png|19px|middle|link=]] Void Nidhogg Strike |
✘ | ✘ | ✘ | x2 | ✘ | ✘ | ✔ |
| [[File:Icon Element Error: Table Quests not found. .png|19px|middle|link=]] Void Agni Strike |
✔ | ✘ | ✘ | ✘ | x2 | ✘ | ✘ |
| [[File:Icon Element Error: Table Quests not found. .png|19px|middle|link=]] Volcanic Chimera Strike |
✔ | ✘ | ✘ | ✔ | ✔ | ✔ | ✔ |
Boss Ability:  Disperse
Boss Ability: Disperse
Boss Ability: Disperse
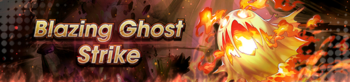
Boss Ability:  Ranged Resistance
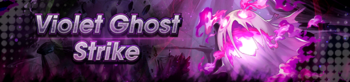
Boss Ability: Ranged Resistance
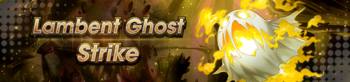
Boss Ability: Ranged Resistance
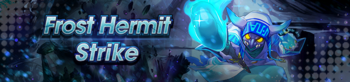
Boss Ability:  Propagation
Boss Ability: Propagation
Boss Ability:  Dull
Dull
Boss Ability: Dull

Boss Ability: Dull
Boss Ability:  Petrify
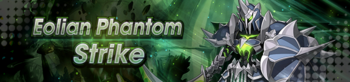
Boss Ability:  Soul Eater,
  Spectral Shield
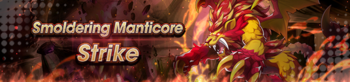
Boss Ability:  Fury
Fury
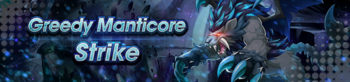
Boss Ability: Fury
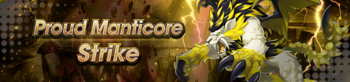
Boss Ability: Fury
Boss Ability: Fury
Boss Ability:  Dragon Delay, Dull
Boss Ability:  Whirlpool,
  Skill Resistance
Boss Ability:  Divine Protection, Dragon Delay
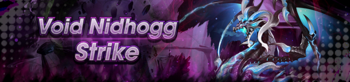
Boss Ability:  Enervation, Ranged Resistance
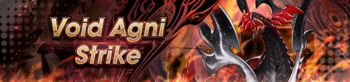
Boss Ability:  Scorching Air, Skill Resistance
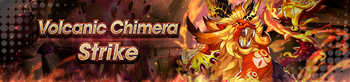
Boss Ability:  Overgrowth,
  Frenzy

Recurring Events
Daily Events are repeatable missions that serve as the primary source of most materials. Most Daily Event quest offer an additional Daily or Weekly reward for a limited number of completions. The limit is shared by all quests within a single category (Elemental Ruins has a pool of two daily bonuses that are shared by all 5 elemental ruins), but the rewards themselves are determined by the specific quest completed.
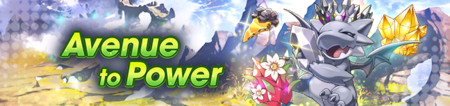
Unlock: Chapter 2/2-1
 Mana
Mana
Unlock: Chapter 2/2-1
Primary Reward:  Rupies
Unlock: Chapter 2/2-1
Primary Reward: Elemental Orbs
Event Exchange Shop: Standard Exchange
| Sun | Mon | Tue | Wed | Thur | Fri | Sat |
|---|---|---|---|---|---|---|
| All | All |  |
 |
 |
 |

|

Challenge Events
Unlock: Chapter 3/4-4
Primary Reward: Dragon Scales/Wyrm Spheres
Event Exchange Shop: Dragon Trials Exchange
Unlock: Chapter 3/4-4
Unlock: Chapter 3/4-4
Unlock: Chapter 3/4-4
Unlock: Chapter 4/5-4
Unlock: Chapter 5/4-4

Unlock: Chapter 6/4-4
Primary Reward: Dyrenell Coins, Insignias, Tablets
Event Exchange Shop: Imperial Onslaught Exchange
Tablet Battle
|
Sword | Blade | Dagger | Axe | Lance | Bow | Wand | Staff |
|---|---|---|---|---|---|---|---|---|
| [[File:Icon Element Error: Table Quests not found. .png|19px|middle|link=]] Battle at Mount Adolla |
✘ | ✔ | ✘ | ✘ | ✔ | ✘ | ✔ | ✘ |
| [[File:Icon Element Error: Table Quests not found. .png|19px|middle|link=]] Battle at Myriage Lake |
✘ | ✘ | ✘ | ✔ | ✘ | ✔ | ✘ | ✔ |
| [[File:Icon Element Error: Table Quests not found. .png|19px|middle|link=]] Battle in Rovetelle Forest |
✔ | ✘ | ✔ | ✘ | ✘ | ✘ | ✘ | ✔ |
| [[File:Icon Element Error: Table Quests not found. .png|19px|middle|link=]] Battle in the Dornith Mountains |
✔ | ✔ | ✔ | ✔ | ✘ | ✘ | ✘ | ✘ |
| [[File:Icon Element Error: Table Quests not found. .png|19px|middle|link=]] Battle at the Wartarch Ruins |
✘ | ✘ | ✘ | ✘ | ✔ | ✔ | ✔ | ✔ |




Unlock: Complete Master Difficulty Dragon Trial
Primary Reward: Wyrm Greatspheres, High Dragon Weapon Materials
Event Exchange Shop: Advanced Dragon Trials Exchange
Day Quest
|
Mon | Tue | Wed | Thu | Fri | Sat | Sun |
|---|---|---|---|---|---|---|---|
| [[File:Icon Element Error: Table Quests not found. .png|19px|middle|link=]] High Midgardsormr's Trial/Master |
✔ | ✘ | ✘ | ✔ | ✘ | ✔ | ✔ |
| [[File:Icon Element Error: Table Quests not found. .png|19px|middle|link=]] High Mercury's Trial/Master |
✔ | ✘ | ✔ | ✘ | ✘ | ✔ | ✔ |
| [[File:Icon Element Error: Table Quests not found. .png|19px|middle|link=]] High Brunhilda's Trial/Master |
✘ | ✔ | ✘ | ✘ | ✔ | ✔ | ✔ |
| [[File:Icon Element Error: Table Quests not found. .png|19px|middle|link=]] High Jupiter's Trial/Master |
✘ | ✘ | ✔ | ✘ | ✔ | ✔ | ✔ |
| [[File:Icon Element Error: Table Quests not found. .png|19px|middle|link=]] High Zodiark's Trial/Master |
✘ | ✔ | ✘ | ✔ | ✘ | ✔ | ✔ |
Unlock: Complete Midgardsormr's Trial: Master
Prologue: The Height of the Tempest
Unlock: Complete Mercury's Trial: Master
Prologue: The Height of the Tides
Unlock: Complete Brunhilda's Trial: Master
Prologue: The Height of the Flames
Unlock: Complete Jupiter's Trial: Master
Prologue: The Height of the Storms

Unlock: Complete Zodiark's Trial: Master
Prologue: The Height of the Shadows

Unlock: Chapter 10 / 6-3
Primary Reward: Agito Weapon crafting materials
Event Exchange Shop: The Agito Uprising Exchange
 Volk's Wrath
Boss Ability:  Plague,
  Life Drain
 Ciella's Wrath
Boss Ability:  Veil,
Veil,  Vulnerability
 Ayaha & Otoha's Wrath
Boss Ability:  Union,
  Warabe Asobi,
  Tosenbo,
  Toryanse
 Kai Yan's Wrath
Boss Ability:  Battleground,
  Adamantine Shield